


Trekking poles for photography while hiking?
Trekking poles are essential for hikers seeking stability and reduced joint impact, but their utility extends far beyond walking aids. For photographers who hike, these versatile tools can transform into powerful allies, enabling stunning captures in challenging environments. By integrating photography-specific techniques and accessories, you can leverage your poles to achieve stability, creative perspectives, and streamlined gear management on the trail.
Recommended trekking pole purchase link: https://s.click.aliexpress.com/e/_c4M7OWaN
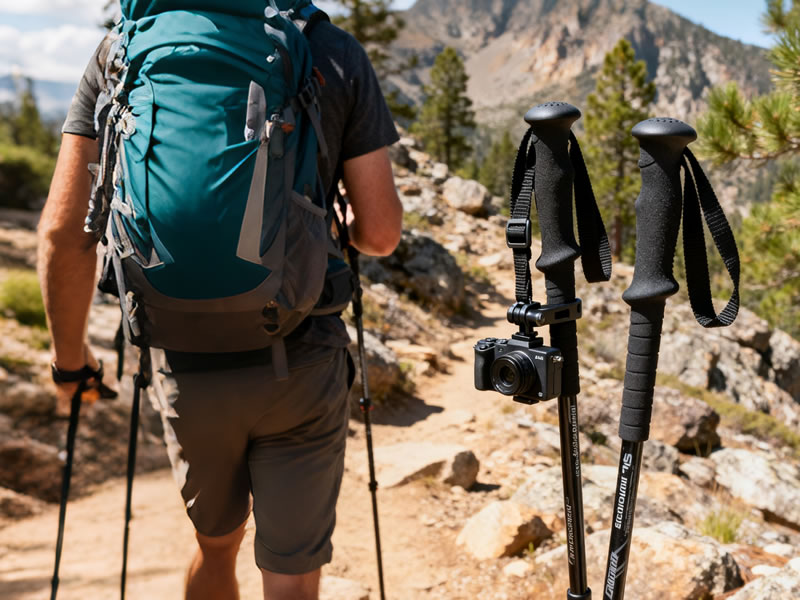
1. Monopod Conversion for Stable Shots
The simplest yet most effective photography hack is converting a trekking pole into a monopod. Many poles feature a standard ¼"-20 thread under the wrist strap cap or grip, allowing you to attach a thread adapter and mount a camera1. This setup provides crucial stability for:
- Long Exposures: Capture smooth waterfalls or low-light landscapes without a full tripod.
- Telephoto Shots: Reduce shake when using heavy lenses for wildlife or distant peaks.
- Elevated Perspectives: Extend the pole to shoot over obstacles like vegetation or crowds.
For optimal results, use poles with lever-lock mechanisms for quick height adjustments and ensure the pole is firmly planted before shooting.
2. Creative Photography Techniques
- 360-Degree Panoramas: Combine two poles (e.g., Solo Trekking Pole) to create an extended monopod (up to 2.54 meters) for sweeping aerial panoramas1.
- Low-Angle Shots: Invert the pole to ground-level for dynamic foregrounds like wildflowers or streams.
- Group and Self-Portraits: Use phone mounts or grips attached to the pole for inclusive group shots or hands-free selfies7.
3. Gear Integration and Accessibility
- Quick-Access Mounts: Attach action cameras (e.g., DJI Osmo) directly to poles using specialized clamps or flexible grips for first-person trail footage7.
- Tool Multifunctionality: Some poles (e.g., Black Diamond Pursuit) include built-in hex tools for on-the-go adjustments, ideal for repairing camera gear4.
- Weight Distribution: Use poles to stabilize heavy camera packs during breaks or when navigating technical terrain2.
4. Stealth and Safety in Wildlife Areas
- Quiet Operation: Fit rubber tip covers (paw tips) to muffle metal-on-rock noise, avoiding wildlife disturbance2.
- Non-Reflective Finishes: Choose matte, earth-tone poles to minimize visual alerts to animals2.
- Probing Unstable Ground: Test muddy or snowy surfaces with poles before setting up shots8.
5. Essential Accessories for Photography
- Thread Adapters: Universal adapters screw into pole grips for camera mounting1.
- Phone/Action Camera Mounts: Secure devices with rubberized clamps for vibration-free shots7.
- Rubber Tips: Provide grip on hard surfaces and protect carbide tips from wear4.
6. Practical Workflow Tips
- Pre-Scouting: Use poles to gauge shot angles before unpacking camera gear6.
- Efficient Transitions: Adjust pole length swiftly for varying terrains: shorten for ascents, lengthen for descents4.
- Hands-Free Flexibility: Collapse poles when not needed for photography to free hands for other tasks2.
Conclusion
Trekking poles are transformative tools for hiking photographers, merging stability, creativity, and efficiency. By mastering monopod techniques, leveraging accessories, and prioritizing stealth, you can elevate your trail photography while reducing gear strain. Whether shooting vast landscapes or intimate details, your poles will prove as indispensable as your camera. Embrace these strategies to capture the wilderness with clarity and confidence—every step of the way.


