


Cleaning hiking poles after saltwater or muddy trails
Your trekking poles are faithful companions through every environment, from coastal paths with saltwater crossings to thick, muddy inland trails. However, these elements pose significant threats to your equipment's longevity and performance. Saltwater accelerates corrosion in metal components, while mud contains abrasive particles that can wear down finishes and jam mechanisms. Proper cleaning isn't just about aesthetics—it's a crucial maintenance ritual that preserves your investment and ensures reliability. This definitive guide provides a thorough, step-by-step approach to restoring your poles after exposure to these challenging conditions.
Recommended trekking pole purchase link: https://s.click.aliexpress.com/e/_c4M7OWaN
Why This Cleaning is Non-Negotiable
Understanding the "why" behind the process reinforces the importance of consistent care:
- Saltwater's Hidden Damage: Salt is highly corrosive to aluminum alloys and can degrade carbon fiber resin over time. It leaves crystalline deposits that attract moisture, leading to accelerated oxidation and pitting in metal components, particularly locking mechanisms.
- Mud's Abrasive Action: Dried mud contains fine silica particles that act like sandpaper on pole shafts and can infiltrate locking mechanisms, causing premature wear and potential failure.
- Performance Preservation: Grit and salt in twist-lock mechanisms can prevent proper engagement, while buildup on lever locks can hinder their operation.
Immediate Post-Hike Action Plan
The golden rule: don't let mud or salt dry on your poles.
- Initial Rinse: Before entering your home or vehicle, give poles a preliminary rinse with a garden hose or water bottle to remove the bulk of surface mud and salt.
- Partial Disassembly: Collapse the poles completely and separate all sections. Remove baskets if they're caked with mud.
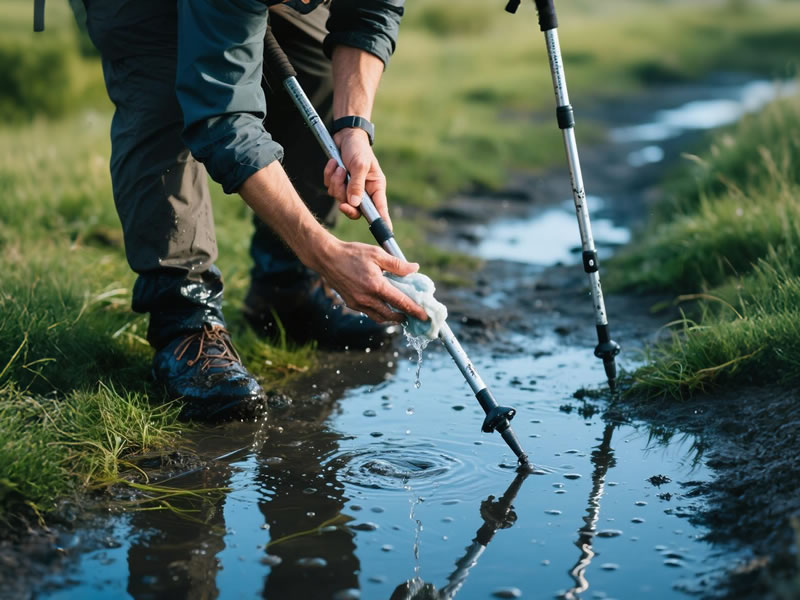
The Comprehensive Cleaning Process
For Muddy Trails:
- Soak and Soften: Submerge pole sections in a bathtub or large bucket filled with lukewarm water for 15-20 minutes. This loosens stubborn mud.
- Brush Away Debris: Use a soft-bristled brush (an old toothbrush works perfectly) to gently scrub all surfaces, paying special attention to:Locking mechanisms (both external lever locks and internal twist locks)The adjustable sections where they overlapGrooves in the gripsAround the tip assembly
- Clean the Grips:Cork: Use a slightly damp cloth—avoid oversaturation.Foam: Gently squeeze warm, soapy water through the foam, then rinse with clean water.
- Inspect Tips: Check for mud packed around the carbide tip. Use a thin tool like a toothpick to clear any debris from the tip's grooves.
- Final Rinse: Ensure all soap residue and loosened dirt are completely washed away.
For Saltwater Exposure:
- Thorough Freshwater Rinse: This is the most critical step. Rinse each section thoroughly inside and out with fresh, clean water. Pay special attention to:The interior of each pole sectionAll locking mechanismsThreaded connections for tips and baskets
- Displacement Rinse: For twist-lock poles, extend the sections halfway and pour fresh water into the gap while working the mechanism. This helps flush salt from the internal collet.
- Mild Soap Wash: Use a mild dish soap solution to remove any remaining salt residue and oils from handling.
Drying: The Critical Final Step
Improper drying can be as damaging as not cleaning at all.
- Air Dry Completely: Extend all pole sections fully and leave them in a well-ventilated area away from direct heat sources.
- Dry Locking Mechanisms: Gently tap poles upside down to remove water droplets from locks. Use a cotton swab to dry hard-to-reach areas in lever mechanisms.
- Verify Dryness: Allow at least 24 hours for complete drying, especially for twist-lock mechanisms where moisture can be trapped internally.
Advanced Maintenance After Cleaning
Once your poles are completely dry:
- Lubricate Moving Parts: Apply a small amount of dry silicone lubricant to:Lever lock pivots and threadsThe exterior of lower pole sections (where they slide into upper sections)
- Check for Damage: Clean poles provide the perfect opportunity to inspect for:Hairline cracks in carbon fiberDents or significant scratches in aluminumWear on tips and basketsFraying wrist straps
Common Mistakes to Avoid
- Never Use Harsh Chemicals: Solvents, bleach, or abrasive cleaners can damage finishes and degrade composite materials.
- Avoid High-Pressure Spray: Pressure washers can force water and contaminants into sealed mechanisms, causing more harm than good.
- Don't Overtighten: When reassembling, tighten locking mechanisms and baskets firmly but not excessively.
- Never Store Wet: Always ensure poles are completely dry before collapsing and storing them.
Seasonal Deep Cleaning Recommendation
For regular hikers, a quarterly deep cleaning is advisable:
- Complete disassembly of all components
- Inspection and replacement of worn parts
- Application of appropriate lubricants
- Checking and tightening of all components
Conclusion: A Small Investment for Long-Term Returns
The 20-30 minutes spent properly cleaning your trekking poles after saltwater or muddy trail exposure pays substantial dividends in equipment longevity and trail reliability. This simple maintenance routine prevents the slow, cumulative damage that eventually renders poles unusable. By incorporating these practices into your post-hike ritual, you ensure your poles remain trusted companions for thousands of miles, ready to provide stability and support wherever your next adventure leads. Remember: clean gear is reliable gear, and on the trail, reliability isn't just convenient—it's essential for safety.


