


Hiking Poles with a Camera Mount: Best Options and Reviews?
For the photographer who hikes or the hiker who photographs, the allure of combining trekking poles with a camera support system is strong: it promises lighter pack weight and quicker access to stable shots. However, this hybrid gear category requires careful evaluation. The "best" option depends heavily on your camera weight, desired stability, and hiking style. This guide reviews the leading solutions, from integrated systems to universal adapters.
Recommended trekking pole purchase link: https://s.click.aliexpress.com/e/_c4M7OWaN
Understanding the Limitations: Monopod vs. Tripod
First, a crucial distinction: A single hiking pole with a camera mount functions as a monopod, not a tripod. It provides stabilization for slower shutter speeds than handholding (often 1-2 stops) and is excellent for reducing camera shake, but it cannot stand alone for long exposures, self-portraits, or in wind. True tripod stability requires three legs.
Top Solutions and Detailed Reviews
1. The Dedicated System: TrailPix
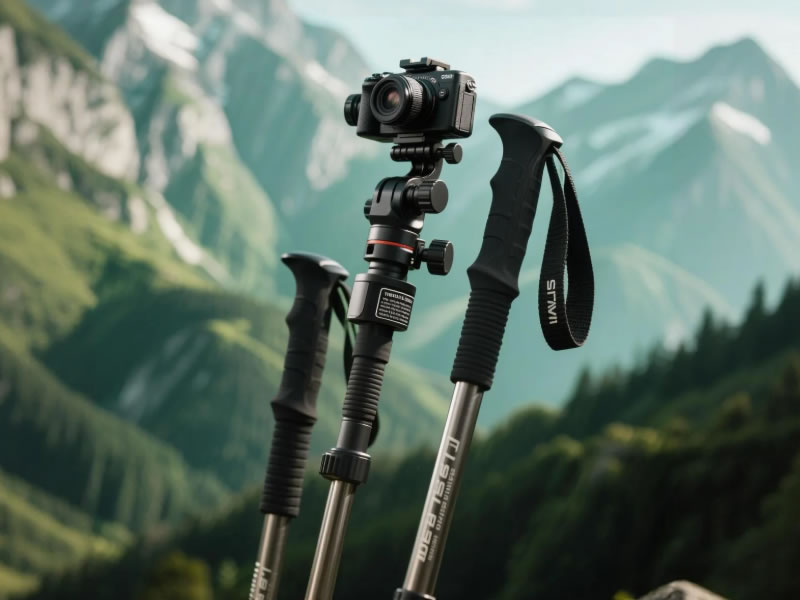
- What it is: A standalone, ingenious accessory system, not a pole itself. The TrailPix kit uses a lightweight hub to connect three of your existing trekking poles into a surprisingly stable, full-height tripod.
- Best For: Hikers wanting genuine tripod stability without carrying a dedicated tripod.
- Pros:Provides actual three-leg tripod stability capable of supporting DSLRs with medium lenses.Extremely lightweight for its capability (the hub is ~3 oz).Utilizes gear you already carry (your poles).
- Cons:Setup takes 1-2 minutes; not for "grab-and-shoot" moments.Requires flat, even ground for all three poles to sit correctly.Slight learning curve for secure assembly.
- Verdict: The most versatile and stable backcountry photography solution that integrates with poles. A top choice for serious landscape photographers who hike.
2. Brand-Integrated Mounts: LEKI Carbon FX & Others
- What it is: Some LEKI poles (like certain Carbon FX models) feature a standard 1/4"-20 camera screw thread integrated directly into the top of the grip. Simply unscrew a cap to reveal the mount.
- Best For: Hikers wanting a seamless, minimalist monopod for lightweight cameras and quick shots.
- Pros:Clean, integrated design with no extra parts to lose.Extremely fast deployment.Good for compact cameras, smartphones, and lightweight mirrorless bodies.
- Cons:Only a monopod.The mount point is at the grip, which can be awkward for low-angle shots and may transmit hand vibrations.Limited to specific pole models.
- Verdict: A elegant, convenient solution for casual trail photography with light gear. Check current LEKI line-up for availability.
3. Universal Adapter Clamps (The Most Common Solution)
- What it is: Aftermarket clamps that attach to your pole's shaft, just below the grip. Popular models include the Trailblazer Camera Mount and generic versions.
- Best For: Hikers who want to add a monopod function to any existing pole.
- Pros:Highly compatible—works with almost any pole diameter.Inexpensive and readily available.Can be left attached or easily removed.
- Cons:Adds bulk and weight to the pole's grip area.Clamp mechanisms can loosen or slip, especially with heavier cameras.Positioning can feel less stable than an integrated mount.
- Verdict: A practical, low-cost "try-it" option. Ensure the clamp has a secure locking mechanism and a rubberized interior to protect your pole's finish.
Critical Considerations Before You Buy
- Camera Weight & Stability: This is the paramount safety and functional concern. Never mount a heavy DSLR with a long lens on a pole not explicitly rated for it. The torque can damage the mount, and a falling camera can be destroyed or cause injury. Most monopod solutions are best for cameras under 2 lbs (0.9 kg).
- Pole Integrity: Using your pole as a monopod applies different stresses. Ensure your poles are in good condition, especially the locking mechanisms.
- Quick Release Plate: For any solution, using an Arca-Swiss or similar quick-release plate system is highly recommended for speed and security.
- The Two-Person Rule: For group photos using a pole monopod, one person must always remain touching the camera to prevent a catastrophic tip-over.
The Professional Alternative: Separate Systems
Many professional outdoor photographers conclude that a high-quality, compact tripod (like a Peak Design Travel Tripod or a Gitzo Mountaineer series) paired with standard hiking poles is the superior setup. This guarantees absolute stability for any shot, keeps your poles free for balancing, and often results in a more reliable, faster workflow, albeit with slightly more weight.
Final Recommendations
- For the Photographer-First Hiker: Choose the TrailPix system. It’s the only option that gives you genuine compositional freedom and stability for longer exposures.
- For the Hiker-First Casual Photographer: A LEKI pole with an integrated thread or a universal adapter clamp is perfect for steadying quick shots of vistas or wildlife with a smartphone or light mirrorless camera.
- For Versatility and Value: Start with a universal adapter clamp to see if you use the function often before investing in a dedicated system.
Bottom Line: Hiking poles with camera mounts are brilliant tools for improving stability on-the-go, but they are not a replacement for a dedicated tripod for critical work. By matching the solution to your camera gear and photographic ambitions, you can effectively blend two passions without compromising either.


