


How to Convert Hiking Poles into a Monopod for Photography?
For photographers on the trail, the desire to travel light often conflicts with the need for stable shots. Converting your hiking poles into a monopod is a clever solution that leverages gear you're already carrying. While it won't replace a full tripod for long exposures, it provides excellent stabilization for slower shutter speeds, video, and precise framing. Here’s a comprehensive guide to making the conversion safely and effectively.
Recommended trekking pole purchase link: https://s.click.aliexpress.com/e/_c4M7OWaN
Understanding the Limitations: Monopod vs. Tripod
First, manage expectations. A monopod provides one-axis stability. It eliminates camera shake from your hands and body, allowing you to shoot at shutter speeds 2-4 stops slower than handheld. However, it cannot stand alone. You must always keep a hand on your camera. It's ideal for:
- Slower action or wildlife shots
- Panoramic sequences
- Lightweight video stabilization
- Taking the weight of a heavy lens off your neck
Method 1: The Integrated Solution (Cleanest)
Some premium hiking poles, notably from LEKI, feature a built-in 1/4"-20 camera screw thread under a removable cap on the top of the grip.
- Process: Simply unscrew the cap to reveal the thread. Screw your camera (or a ball head) directly onto the pole.
- Pros: Extremely clean, secure, and fast. No extra parts to lose.
- Cons: Limited to specific pole models. The connection point is at the grip, which can be awkward for low-angle shots.
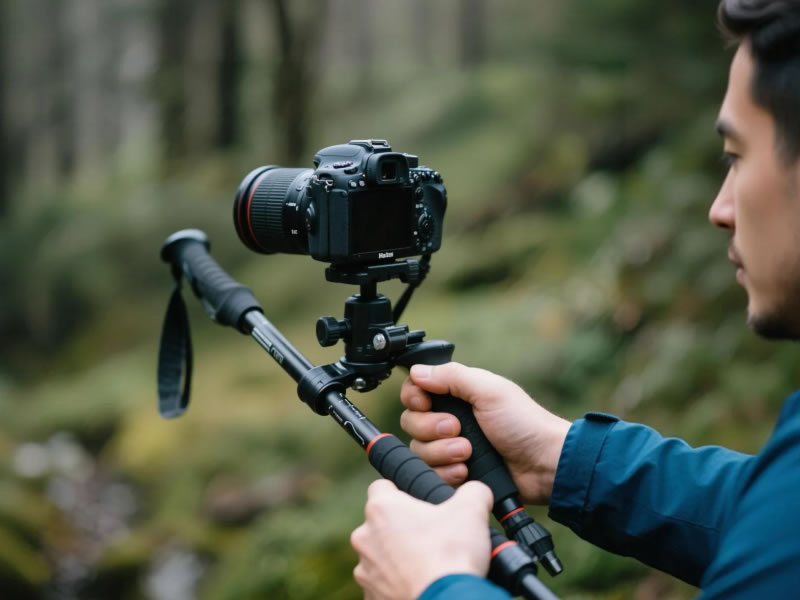
Method 2: The Universal Clamp Mount (Most Common & Versatile)
This is the go-to solution for most poles. It involves a universal camera mount clamp that attaches to your pole's shaft.
- Process:Purchase a quality clamp (e.g., brands like "Trailblazer" or "Pedco").Secure the clamp tightly to your pole's shaft, just below the grip. Ensure the rubberized interior grips the pole to prevent slippage and scratches.Attach your camera or ball head to the clamp's 1/4"-20 screw.
- Pros: Works with almost any pole diameter. Relatively inexpensive. Can be positioned anywhere on the shaft for better balance.
- Cons: Adds bulk and a small amount of weight to your pole. Cheap clamps can slip or have poor thread quality.
Method 3: The DIY/Adapter Method
For a minimalist approach, you can attach a 1/4"-20 screw adapter directly to your pole if it has a removable grip cap, though this is less common and secure than dedicated solutions.
Essential Component: The Ball Head
Do not screw your camera directly onto the pole or clamp. A small ball head is crucial for:
- Framing: Allowing you to tilt and pan the camera.
- Balance: Letting you adjust the camera's center of gravity.
- Safety: Providing a more secure, multi-point connection than a direct screw.
- Use an Arca-Swiss compatible quick-release plate system for speed and security.
Step-by-Step Conversion & Best Practices
- Prepare Your Pole: Extend it to a comfortable standing height, slightly shorter than usual for better control. Ensure all locks are tight.
- Attach the Mount: Secure your chosen mounting system (integrated thread or clamp) firmly.
- Add the Ball Head: Screw the ball head onto the mount and tighten.
- Attach Your Camera: Secure the camera (with its quick-release plate) to the ball head. Tighten all connections.
- Balance the Rig: Loosen the ball head and adjust the camera's position until it sits steadily without you holding it (while the pole is vertical). Re-tighten.
Critical Safety and Usage Tips
- NEVER Walk Away: A monopod is top-heavy and will fall over. Always maintain contact with the camera.
- Weight Limit: Be cautious with heavy DSLR and telephoto lens combinations. The torque can stress the clamp, ball head, or pole grip. For heavy gear, consider a dedicated, stronger monopod.
- Use the Strap: Always keep your camera neck strap on as a safety leash.
- Check Stability Frequently: Vibration from walking can loosen connections. Periodically check that the clamp, ball head, and camera plate are secure.
- Pole Integrity: Using your pole as a monopod applies different stresses. Avoid putting excessive lateral pressure on it.
The Professional Workflow for Trail Photography
Many serious photographers use a hybrid system:
- Use the hiking pole monopod for quick, stabilized shots while moving.
- Carry an ultralight tripod (e.g., Peak Design Travel Tripod) in the pack for true long exposures, self-portraits, or critical compositions.
- Use the poles independently for hiking stability.
Final Recommendation
The universal clamp mount combined with a compact ball head is the most versatile and reliable conversion method for most hikers. It offers a perfect balance of stability, security, and flexibility.
Remember: Your converted pole is a stabilization aid, not a standalone support. By following these steps and respecting the gear's limits, you can significantly improve your trail photography without adding a dedicated piece of equipment to your pack. It’s the ultimate expression of multi-use gear, letting you hike further and shoot better.


