


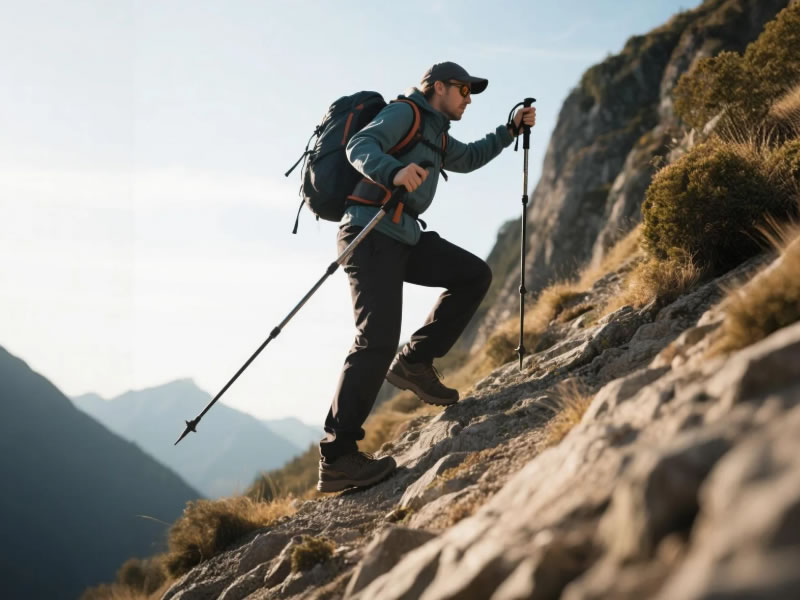
Hiking Poles for Downhill Hiking: Mastering Descents with Confidence and Control
For many hikers, the exhilaration of reaching a summit is quickly tempered by the daunting prospect of the journey back down. Descending places unique and intense stresses on the body, particularly the knees, ankles, and quadriceps. This is where hiking poles transition from helpful accessories to essential safety tools. Mastering downhill hiking with poles can transform a painful, precarious descent into a controlled, confident, and enjoyable part of your adventure.
Recommended trekking pole purchase link: https://s.click.aliexpress.com/e/_c4M7OWaN
The Critical Role of Poles on Descents: More Than Just Balance
The benefits of using poles specifically for downhill sections are profound and measurable:
- Joint Preservation and Impact Reduction: This is the most significant advantage. On a descent, your knees absorb forces equivalent to 4-8 times your body weight with each step. Poles act as extensions of your arms, allowing your upper body to share this load. Studies suggest they can reduce the compressive force on knees by up to 25%. This is a game-changer for managing or preventing knee pain, arthritis, or past injuries.
- Enhanced Stability and Traction: On loose scree, muddy slopes, or wet rocks, two points of contact are inherently unstable. Planting two poles ahead creates a stable tripod or quadpod stance, drastically reducing the risk of slips and falls. The carbide tips dig into terrain, providing critical traction that your footwear alone may not.
- Quadricep Fatigue Delay: On long descents, your thigh muscles work eccentrically to brake your body weight, leading to severe muscle burn and shaky "jelly legs." Poles allow you to use your arms, shoulders, and back to control your speed, significantly delaying muscle fatigue and keeping you steadier for longer.
- Improved Posture and Control: Without poles, it’s natural to lean back or adopt a hesitant, braking posture, which can strain the back and reduce visibility. Poles encourage a more upright, forward-leaning posture with your center of gravity over your feet, promoting better balance and a more natural gait.
Mastering the Downhill Technique: It’s All in the Plant
Simply carrying poles isn't enough; proper technique is key:
- Adjust the Length: For a sustained descent, lengthen your poles by 5-10 cm (2-4 inches) from your standard flat-ground setting. This allows you to plant them comfortably in front of you without excessive bending at the waist.
- The Forward Plant: The core principle is to plant your pole tips ahead and downhill of your body with each step. As you step forward, your pole should already be securely placed, ready to bear weight.
- Weight Transfer and Rhythm: Develop a rhythm: Right pole plants as left foot steps forward, and vice versa. Gently but firmly transfer a portion of your weight through the wrist strap (not just your grip) onto the pole. This absorbs shock and propels you forward with control.
- Double Planting for Steep or Technical Sections: On very steep, loose, or tricky terrain, use a "double plant" technique. Plant both poles firmly downhill, then take one or two steps down to meet them. This provides maximum stability for each move.
Choosing the Right Poles for Downhill Dominance
Not all poles are created equal for demanding descents. Look for these features:
- Shock Absorption (Recommended but Optional): Poles with internal spring mechanisms can further cushion the impact on your joints and hands. While purists sometimes avoid them for uphill efficiency, they are highly beneficial for dedicated downhill use or those with joint sensitivities.
- Secure Locking Mechanism: This is non-negotiable. You need absolute confidence that your poles won’t collapse under your weight. External lever locks (FlickLocks) are superior to twist locks for downhill reliability, as they are easier to tighten, check visually, and are less prone to slipping under load or in cold weather.
- Durable Construction: Downhill use subjects poles to higher forces. 7075 aluminum offers an excellent balance of strength, durability, and value. While carbon fiber is lighter, ensure you choose a high-quality model rated for high impact if your descents are rugged.
- Comfortable Grips and Straps: You’ll be leaning heavily on them, so ergonomic cork or foam grips that wick moisture are ideal. Proper use of wide, padded wrist straps is essential to transfer weight off your hands and prevent fatigue.
The Downhill Descent Checklist
- Before the Descent: Lengthen your poles. Check that all lockings are secure. Take a moment to survey the trail ahead.
- During: Focus on a steady rhythm, planting ahead with each step. Use your straps. Stay upright.
- Post-Hike: Clean the dirt from the tips. Check poles for any stress or damage, especially after a rocky descent.
Conclusion: Descend with Power, Not Pain
Downhill hiking doesn’t have to be a punishing ordeal to be endured. With the right poles and the correct technique, you can tackle descents with increased speed, dramatically reduced pain, and far greater safety. Investing in a sturdy pair of poles and practicing your downhill form is an investment in your long-term joint health and hiking enjoyment. It empowers you to explore more challenging trails, recover faster, and ultimately, log more miles with a smile—all the way from the peak back to the trailhead.
Ready to climb? Check out our companion guide on "Uphill Hiking Pole Techniques for Maximum Efficiency" to master the entire mountain.


