


How to Test Hiking Poles Before Buying: The Ultimate Hands-On Checklist
Purchasing hiking poles is an investment in your comfort and safety on the trail. While online reviews are helpful, nothing replaces a hands-on evaluation. A proper test can reveal crucial insights about fit, feel, and long-term durability that specifications alone cannot. Whether you're in an outdoor retailer or testing a shipped pair at home, this comprehensive guide will ensure you make a confident, informed decision.
Recommended trekking pole purchase link: https://s.click.aliexpress.com/e/_c4M7OWaN
Phase 1: The In-Store or Initial Inspection Test
If possible, visit a specialty outdoor shop. Their staff and demo models are invaluable.
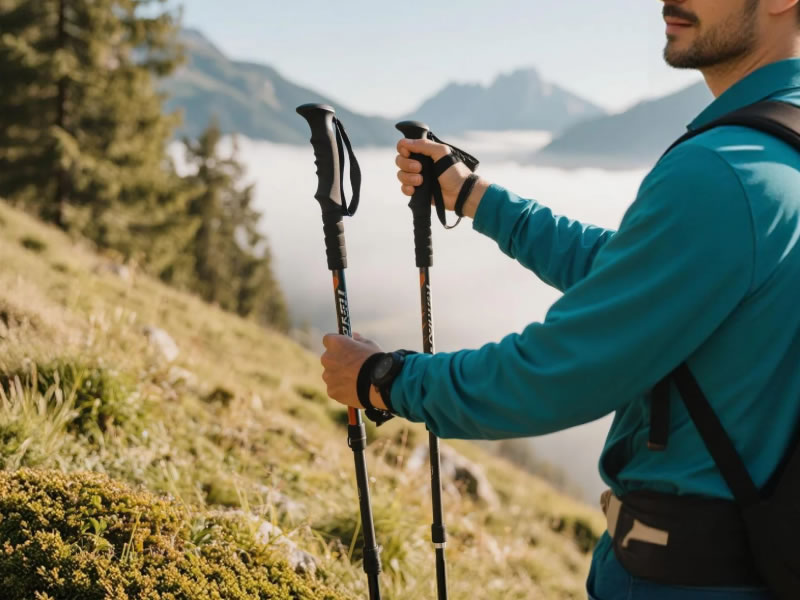
1. The Fit & Feel Test (The 90-Degree Rule):
- Action: Stand upright on a hard, level surface wearing your typical hiking shoes. Adjust the pole to its suggested length (many have height markers). Grip the handle naturally.
- What to Look For: With the pole tip on the ground, your elbow should form a 90-degree angle, and your forearm should be parallel to the floor. This is your neutral, flat-terrain length.
- Grip Comfort: The grip should feel secure and ergonomic in your palm. Can you wrap your fingers around it comfortably without straining? For women or those with smaller hands, note if a "women's specific" or smaller-diameter grip feels more natural.
2. The Locking Mechanism Stress Test (The Most Critical Test):
- Action: Extend the pole to your correct length. Engage the locking mechanism (lever lock or twist lock). Place the tip firmly on the ground and lean your full body weight onto the pole, simulating a steep descent or a recovery from a stumble. Apply weight multiple times, with increasing force.
- What to Look For: The lock must not slip, collapse, or creak. A high-quality lock will feel solid and inspire total confidence. External lever locks are generally easier to assess and operate. For twist locks, ensure you can tighten them sufficiently without excessive force and that they don't feel gritty or unstable.
3. The Grip & Strap Integration Test:
- Action: Put the wrist strap on correctly (slide hand up from the bottom). Grip the pole and simulate a walking motion, pushing down through the strap.
- What to Look For: The strap should be padded, adjustable, and distribute pressure comfortably across the back of your hand. Does the strap design encourage proper technique, or does it chafe? Does the grip material (cork, foam) feel comfortable against your skin?
Phase 2: The "In-Motion" and Usability Assessment
4. The Weight & Balance Test:
- Action: Pick up the pole and simulate a rhythmic hiking stride in the store aisle. Focus on the "swing weight" – how it feels as you move it.
- What to Look For: Does the pole feel like a natural extension of your arm, or is it cumbersome? Carbon fiber will feel noticeably lighter and vibrate less than aluminum. The balance point should be neutral, not overly tip-heavy.
5. The Adjustment Range & Ease Test:
- Action: Repeatedly shorten and lengthen the pole through its entire range. Try this with cold hands or while wearing thin gloves.
- What to Look For: Are the adjustments smooth and intuitive? Can you operate the locks quickly and with minimal fuss? Ensure the pole's maximum and minimum lengths will accommodate your needs for uphill (shorter) and downhill (longer) adjustments.
6. The Packability & Collapse Test:
- Action: Fully collapse the telescopic poles or fold the Z-poles. Measure or visualize their packed length.
- What to Look For: Will they fit inside or strap securely to your backpack? Do the collapsed sections feel secure, or do they rattle?
Phase 3: The At-Home Trial (If Applicable)
If buying online from a retailer with a good return policy, replicate these tests at home.
7. The "Staircase" Simulator Test:
- Action: Use a sturdy staircase. Adjust the poles for an uphill setting (shorter) and climb a few steps, focusing on push-off power. Then, adjust for a downhill setting (longer) and carefully descend, using the poles for bracing.
- What to Look For: Do the adjustments make a noticeable difference in posture and comfort? Do the poles feel stable and secure on the uneven surface of the steps?
8. The Vibration and Shock Test:
- Action: On a safe, hard surface (like a driveway), plant the pole firmly and listen/feel.
- What to Look For: Does the shaft transmit a harsh "ping" or a duller thud? Poles with shock absorbers will feel noticeably softer. Excessive vibration on hard surfaces translates to more arm fatigue on rocky trails.
Red Flags to Watch For
- Lock Slippage: Any movement under load is unacceptable.
- Gritty or Sticky Adjustments: Indicates poor machining or potential for future corrosion.
- Excessive Flex or Wobble: The pole should be stiff, not whippy.
- Uncomfortable Hot Spots: If the grip feels wrong in the first minute, it will be painful after an hour.
- Flimsy Components: Cheap plastic parts on baskets, strap adjusters, or lock levers.
Conclusion: Trust Your Instincts
Testing hiking poles is a blend of objective checklist and subjective feel. The right pair should disappear in your hands—becoming a seamless, reliable tool that enhances your movement. By methodically working through these tests, you move beyond marketing claims and connect directly with the performance and craftsmanship of the gear. Your poles are your primary partners in stability; investing this time to test them ensures that partnership is built on confidence, safety, and comfort for all the miles ahead.


