


First walking pole – what to look for?
Buying your first pair of walking poles (also called trekking or hiking poles) can feel overwhelming. With dozens of models, materials, and features, it’s easy to get lost. But the right poles transform hiking from a leg‑heavy slog into a full‑body, joint‑friendly activity. This guide cuts through the noise and tells you exactly what to look for as a beginner – so you can spend less time researching and more time on the trail.
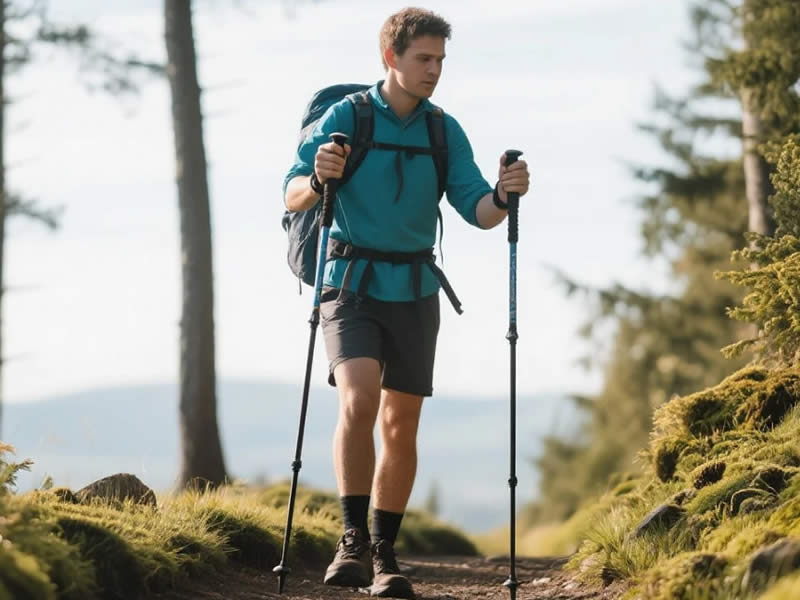
Recommended trekking pole purchase link: https://s.click.aliexpress.com/e/_c4M7OWaN
1. Adjustable Length: The Non‑Negotiable Feature
Your first poles must be adjustable. Fixed‑length poles are for experienced users who know their exact preferred height. As a beginner, you’ll want to experiment. Look for poles that extend from roughly 100 cm to 135 cm – this fits most people between 5’0” and 6’4”. Why adjustable? Because you’ll want shorter poles for climbing uphill (better leverage) and longer poles for descending (more stability). Also, you can share them with hiking partners of different heights.
What to avoid: Cheap fixed‑length poles from discount stores. They almost never fit correctly and can cause shoulder or wrist strain.
2. Locking Mechanism: Flip Locks Over Twist Locks
Poles lock at your chosen length using either twist locks (you rotate the shaft sections) or flip locks (a small lever you snap shut). For your first pair, choose flip locks. They are:
- Easier to use – No guessing how tight to twist; just flip the lever.
- More reliable – Twist locks can slip in cold or wet weather.
- Visually obvious – You can see if the lock is open or closed.
Twist locks are not terrible, but they have a steeper learning curve. Save them for later if you become a pole enthusiast.
3. Shaft Material: Aluminum Is Your Friend
Poles are made from either aluminum or carbon fiber. For a first pair, choose aluminum. Why?
- Durable – Aluminum bends before breaking. If you jam a pole between rocks, it may bend slightly, but you can often straighten it. Carbon fiber can snap without warning.
- Affordable – Good aluminum poles cost $40–80, while carbon starts at $100+.
- Forgiving – Beginners often mistreat poles (leaning too hard, planting at bad angles). Aluminum takes the abuse.
Carbon fiber is lighter and dampens vibration better, but it’s a luxury. Learn on aluminum; upgrade later if you hike often.
4. Grip Material: Cork or Foam – Not Rubber
The grip is where your hand meets the pole. Three common materials:
| Material | Pros | Cons |
|---|---|---|
| Cork | Molds to your hand, wicks sweat, comfortable in all temperatures | More expensive |
| Foam | Soft, cheap, good insulation | Wears out faster, can get slippery when wet |
| Rubber | Very durable | Becomes sticky in heat, causes blisters on long hikes |
For a first pole, cork is best if budget allows. If not, foam is acceptable. Avoid rubber grips for anything longer than an hour.
Also look for grips that have a slight ergonomic curve or indentations for your fingers – they reduce hand fatigue.
5. Wrist Straps: Padded and Adjustable
Many beginners ignore wrist straps or use them incorrectly. A good strap is:
- Padded – To prevent chafing.
- Adjustable – So you can fit it over gloves or a bare wrist.
- Wide – At least 1.5 cm (0.6 in).
Learn the correct way to use straps: slide your hand up through the strap from below, then grip the pole so the strap runs between your thumb and index finger. This lets you relax your grip and transfer force to the strap – a huge fatigue reducer.
6. Tips: Carbide + Rubber
Every pole has a carbide tip (tungsten steel) for digging into dirt, ice, or rock. That’s essential. But for pavement, hard rock, or indoor use, you need rubber tip covers (also called “paws” or “boots”).
- Make sure the poles come with rubber tips or buy a set separately ($5–10). Without them, you’ll damage floors and annoy everyone on paved trails with the loud click‑click.
- Rubber tips also extend the life of the carbide tip.
7. Baskets: Small Is Fine for Beginners
Baskets are the small plastic rings just above the tip. They prevent the pole from sinking too deep into soft ground or snow. Most starter poles come with small “trekking” baskets (about 5 cm diameter). That’s enough for dirt trails. If you hike in deep snow, you’ll need larger “snow baskets” – you can buy them later.
8. Weight: Under 250g Per Pole
Heavy poles tire your arms. Look for aluminum poles that weigh less than 250 grams (0.55 lbs) per pole. Many entry‑level poles are 240–280g. That’s fine. If you see poles over 300g, keep looking – they’ll feel like lead after an hour.
9. Budget: Spend $40–80 for Quality Entry Level
You don’t need $150 poles for your first pair. Excellent starter poles include:
- Cascade Mountain Tech Aluminum – Flip locks, cork grips, rubber tips, carrying bag. ~$50.
- TrailBuddy Trekking Poles – Similar specs, lifetime warranty. ~$60.
- TheFitLife – Good budget option with shock absorption. ~$40.
Avoid poles under $30 – they use poor locks and heavy materials. You’ll replace them in months.
10. Extras That Help
- Carrying bag – Protects your car and stores poles neatly. Many budget poles include one.
- Spare rubber tips – They wear out every 200–300 miles.
- Quick‑adjust levers – Some poles have a small button to release the flip lock – convenient but not necessary.
Putting It All Together – Your First Pair Checklist
Before you buy, run through this list:
- Adjustable length (100–135 cm)
- Flip locks (not twist)
- Aluminum shafts
- Cork or foam grips (avoid rubber)
- Padded, adjustable wrist straps
- Carbide tips + included rubber tip covers
- Small baskets included
- Weight under 250g per pole
- Price between $40–80
- Carrying bag included (nice bonus)
Final Thoughts
Your first walking poles don’t need to be perfect or expensive. Focus on adjustability, flip locks, aluminum shafts, and comfortable grips. Buy from a reputable brand (Cascade Mountain Tech, TrailBuddy, Leki’s entry line). Then take them on a few short hikes to get used to the rhythm – opposite arm with opposite pole. Within a few miles, you’ll wonder how you ever hiked without them. Happy trails


