


Beginner mistakes when buying Trekking Poles?
Buying your first pair of trekking poles seems simple – they’re just sticks, right? Unfortunately, many beginners end up with poles that are uncomfortable, unreliable, or even dangerous. Avoiding common mistakes can save you money, frustration, and potential injury. This article highlights the most frequent errors new hikers make when selecting trekking poles and shows you how to make a smart, informed choice.
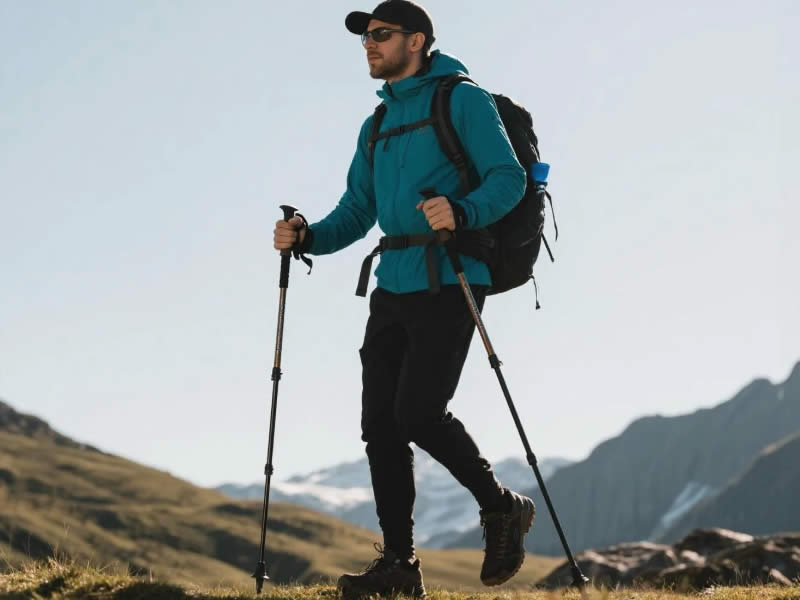
Recommended trekking pole purchase link: https://s.click.aliexpress.com/e/_c4M7OWaN
Mistake #1: Buying Fixed‑Length Poles
Fixed‑length poles are tempting because they’re often cheaper and lighter. However, they are a poor choice for beginners. Your ideal pole length depends on your height, the terrain (uphill vs. downhill), and your personal stride. A fixed pole might feel fine on flat ground but become a nuisance on steep ascents or descents.
The fix: Always buy adjustable (telescoping) poles. Look for a range of roughly 100–135 cm, which fits most people. Adjustable poles also allow you to share them with friends or pack them more easily.
Mistake #2: Choosing Twist Locks Over Flip Locks
Twist locks (where you rotate the shaft sections to tighten) are common on budget poles. They seem simple, but they have serious drawbacks for beginners. It’s easy to under‑tighten (pole slips) or over‑tighten (difficult to loosen). Cold or wet conditions can make them stick or fail.
The fix: Choose flip locks (also called lever locks). They provide a clear visual and tactile confirmation that the pole is secure. Flip locks are more reliable, easier to operate with gloves, and simpler for beginners to master.
Mistake #3: Ignoring Weight
Many first‑time buyers don’t realize how quickly heavy poles fatigue your arms and shoulders. A pair of poles weighing 350g (0.77 lbs) each might not feel heavy in the store, but after 10 miles, your upper body will ache.
The fix: Look for poles under 250g (0.55 lbs) per pole. Aluminum poles in the 240–260g range are fine; carbon fiber can be even lighter. Avoid anything over 300g per pole – they are meant for budget or heavy‑duty use but will tire you out on long hikes.
Mistake #4: Overlooking Grip Material
The grip is your only contact point with the pole. Beginners often buy poles with cheap rubber grips because they seem durable. However, rubber becomes sticky in hot weather, causes blisters, and doesn’t wick sweat.
The fix: Choose cork or foam grips. Cork molds to your hand over time, stays cool, and wicks moisture. Foam is soft and comfortable but less durable. Avoid rubber unless you only hike in cool conditions for short distances.
Mistake #5: Forgetting Rubber Tip Covers
Every trekking pole comes with a sharp carbide tip for digging into dirt, ice, or rock. That tip is destructive on pavement, rock slabs, or wooden bridges – and it’s loud. Beginners often lose or never buy rubber tip covers.
The fix: Ensure your poles include rubber “paws” or buy a set separately ($5–10). Use them whenever you walk on hard surfaces. They protect the carbide tip, reduce noise, and prevent damage to floors and trails.
Mistake #6: Neglecting Wrist Straps
Some beginners remove wrist straps because they seem annoying. Others use them incorrectly (e.g., gripping the strap instead of resting their hand on it). This leads to fatigue and loss of control.
The fix: Use the straps correctly. Slide your hand up from below, then grip the pole so the strap runs between your thumb and index finger. The strap should support your weight, allowing you to relax your grip. Look for padded, adjustable straps – not thin nylon cord.
Mistake #7: Buying Poles That Are Too Short or Too Long
Even with adjustable poles, beginners often set the length wrong. A common error is setting poles too short, forcing a hunched posture and reducing the benefit. Another error is setting them too long, causing shoulder strain.
The fix: The correct length: when standing with your arms hanging naturally, the top of the grip should align with your wrist crease. For uphill sections, shorten by 5–10 cm; for downhill, lengthen by the same. Practice adjusting until it feels natural.
Mistake #8: Choosing Carbon Fiber as a First Pole
Carbon fiber is lightweight and dampens vibration, but it’s also brittle. Beginners tend to jam poles between rocks, lean on them awkwardly, or drop them. Carbon can snap without warning, leaving you with a useless stick.
The fix: Start with aluminum. It’s more forgiving – it may bend but rarely breaks completely. Aluminum is also cheaper, so you won’t cry over scratches. Upgrade to carbon only after you’ve developed good technique and know you’ll treat them gently.
Mistake #9: Not Testing the Locking Mechanism
Many beginners order poles online without ever testing the locks. When they arrive, the locks might be stiff, loose, or difficult to operate.
The fix: If possible, visit a store and try the flip locks on display. Extend each section, lock it, and push down firmly. The pole should not slip. If ordering online, choose a reputable brand with good return policy (e.g., Cascade Mountain Tech, Leki, Black Diamond).
Mistake #10: Skipping a Carrying Bag
Poles are awkward to carry when not in use. Beginners often toss them loose into the car, where they scratch interior panels or get tangled. Or they strap them to a backpack without protection, damaging other gear.
The fix: Many poles come with a simple fabric carrying bag. If not, buy one for $10–15. A bag keeps poles together, protects your car, and makes storage easy.
Final Thoughts
Buying your first trekking poles doesn’t have to be intimidating. Avoid these common mistakes: choose adjustable aluminum poles with flip locks, cork or foam grips, rubber tip covers, and a carrying bag. Keep weight under 250g per pole. Learn to use the wrist straps correctly. With the right pair, you’ll hike farther, feel less fatigue, and protect your knees for years to come. Invest a little time in research now – your trail self will thank you.


