


How to walk correctly with trekking poles?
Using trekking poles seems simple: just put them on the ground and walk. But proper technique makes the difference between effortless hiking and wasted energy, sore arms, and even injury. Learning correct form takes only a few minutes but pays off over every kilometre. Here’s a step‑by‑step guide to walking correctly with trekking poles.
Recommended trekking pole purchase link: https://s.click.aliexpress.com/e/_c4M7OWaN
Step 1: Set the correct length
Before you take a single step, adjust your poles for flat terrain. Stand upright with your arms relaxed at your sides. Raise each hand as if holding a pole, and bend your elbow to 90°. The pole tip should rest on the ground beside your foot. This is your baseline length. Mark it with tape or a marker for quick reference. (Remember to shorten poles by 5–10 cm for uphill and lengthen them by the same for downhill.)
Step 2: Put on your wrist straps correctly
This is the most overlooked but most important step. Most people grip the handle and slip the strap over their wrist – wrong.
- Correct way: Insert your hand up through the strap from below, then bring your hand down onto the grip. The strap should sit between your thumb and index finger, crossing the back of your hand. When you grip, the strap should be snug enough that you can relax your fingers and the pole stays attached.
- Why it matters: The strap transfers your body weight from your arms to the poles, allowing you to push without gripping tightly. This saves hand strength and prevents blisters.
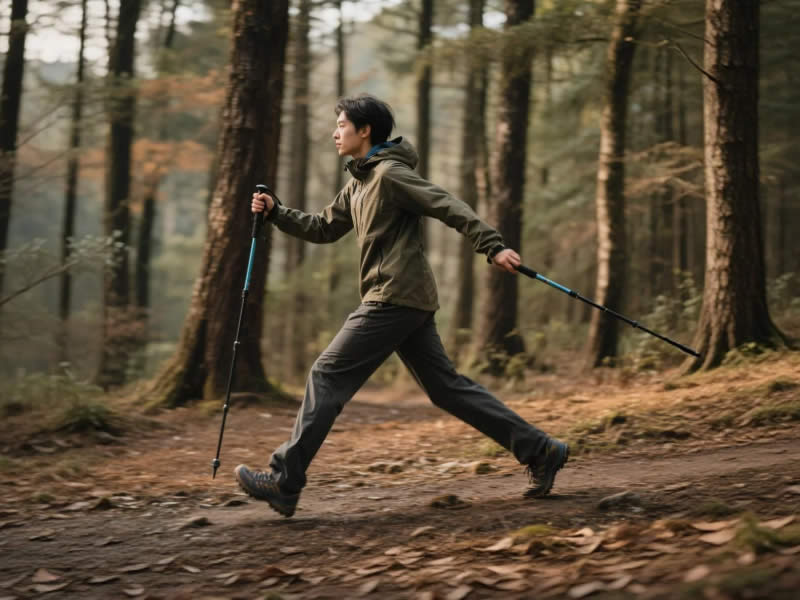
Step 3: Establish the opposite arm‑leg rhythm
Walk naturally, swinging your arms as you normally would. The key is to plant the opposite pole to your forward foot:
- When your right foot steps forward, plant your left pole ahead and slightly to the side.
- When your left foot steps forward, plant your right pole.This diagonal pattern mimics your natural gait and provides balanced stability. Do not plant both poles at the same time except on very steep slopes or for a deliberate double‑plant.
Step 4: Plant the pole at the right position
- Do not overreach: Plant the pole when your hand is roughly level with your forward foot’s heel. Reaching too far forward strains your shoulder and wastes energy.
- Do not plant directly beside your foot: The pole should be slightly to the side (about 15–20 cm from your foot) to avoid tripping.
- Angle the pole slightly backward: As you push off, the pole should be angled so that your hand is behind your body at the end of the push. This propels you forward.
Step 5: Push, don’t just poke
Many beginners simply tap the pole on the ground. Instead, push down and back with each plant, as if you’re propelling yourself forward on skis. Engage your shoulders and back muscles. You should feel your arms and core helping your legs, especially on climbs.
Common mistakes to avoid
- Gripping too tightly: Use the wrist strap – relax your fingers. A death grip leads to hand fatigue and blisters.
- Planting both poles together on flat ground: This breaks your natural rhythm and wastes energy. Use opposite arm‑leg.
- Using poles that are too long or too short: Check your elbow angle regularly.
- Dragging the poles: Lifting them slightly with each step is more efficient than dragging tips on the ground.
- Ignoring wrist straps: Hiking without using the straps properly is like wearing boots without laces.
Practice drill
Find a flat, open field. Walk without poles, paying attention to your natural arm swing. Then pick up your poles, adjust to the correct length, and practice the opposite arm‑leg motion for 5 minutes. Then try on a gentle hill, adjusting length as needed. Within 30 minutes, the movement will feel automatic.
Final tips
- Look ahead, not at your poles: Your peripheral vision will guide the tips.
- Keep your shoulders relaxed: Tension in your neck or shoulders means your poles are likely too long.
- Adjust length whenever terrain changes: It takes only seconds.
Final verdict
Walking correctly with trekking poles is about three things: proper length, correct wrist strap use, and an opposite arm‑leg rhythm. Master these, and you’ll hike with less fatigue, better balance, and reduced joint strain. Practice on easy terrain first, then take your new skills to the mountains. Your body will thank you.


