


How to replace trekking pole grip handles?
Trekking pole grips take constant abuse. Sweat, sunlight, dirt, and thousands of kilometers of gripping eventually wear down foam, cork, or rubber handles. They become slick, crumbly, or separated from the shaft. Replacing them is not only possible but also a cost‑effective way to breathe new life into your favorite poles. This guide walks you through the process, from removing the old grip to installing a new one correctly.
Recommended trekking pole purchase link: https://s.click.aliexpress.com/e/_c4M7OWaN
Why replace grips instead of buying new poles?
Quality trekking poles cost $100–200. Replacement grips typically cost $15–30 per pair. If the shafts, locks, and tips are still in good condition, new grips restore comfort and control for a fraction of the price. Plus, you can upgrade materials – for example, from worn foam to durable cork or from slippery rubber to ergonomic shaped grips.
Tools and materials you will need
- Replacement grips (brand‑specific or universal)
- Heat source: boiling water or a heat gun (low setting)
- A pot large enough to submerge the grip
- Towel or oven mitts (to handle hot grips)
- Rubbing alcohol and a cloth
- Epoxy or contact cement (optional, but recommended)
- Fine sandpaper
- Vice or helper (optional, for stubborn grips)
Step 1: Remove the old grip
Most trekking pole grips are glued onto the shaft with a strong adhesive. Heat softens the glue.
Method A: Boiling water (safest for foam/cork)
- Bring a pot of water to a rolling boil.
- Remove the wrist strap (if possible) to avoid damaging it. If not, tuck it out of the way.
- Submerge only the grip in the boiling water for 2–3 minutes. Do not immerse the locking mechanism or carbon fiber shafts beyond the grip area.
- Using a towel or oven mitt to protect your hands, twist and pull the grip firmly. It should slide off. If not, re‑boil for another minute.
Method B: Heat gun (quicker, but requires care)
- Set a heat gun to low (around 250°F / 120°C).
- Wave the heat gun evenly around the grip, moving constantly to avoid burning foam or cork.
- After 30–60 seconds, test by twisting. Slide off once the glue softens.
Method C: Cutting (last resort for fused grips)
If heat fails, slit the grip lengthwise with a sharp utility knife, being careful not to gouge the aluminum or carbon shaft. Peel the grip off. You will need to clean the shaft thoroughly.
Step 2: Clean and prepare the shaft
- Remove all old glue residue using rubbing alcohol and fine sandpaper. The shaft should be smooth and clean.
- If there are burrs or sharp edges from the old grip’s internal plastic sleeve, smooth them with sandpaper.
- Wipe down with alcohol to ensure a grease‑free surface for the new adhesive.
Step 3: Select the right replacement grip
Replacement grips come in two types:
- Brand‑specific: Made for a particular pole model. They usually have the correct internal diameter (e.g., 16mm, 18mm) and pre‑formed ergonomic shape. Examples: LEKI replacement grips, Black Diamond, Komperdell.
- Universal: Designed to fit a range of shaft diameters (usually 14–18mm). They often have adjustable locking rings or cork/foam sleeves that compress. Less precise but widely available.
Measure your pole shaft’s outer diameter at the grip area. Most are 16mm or 18mm. Also note whether your pole has a straight or ergonomically angled shaft at the grip – some grips are angle‑specific.
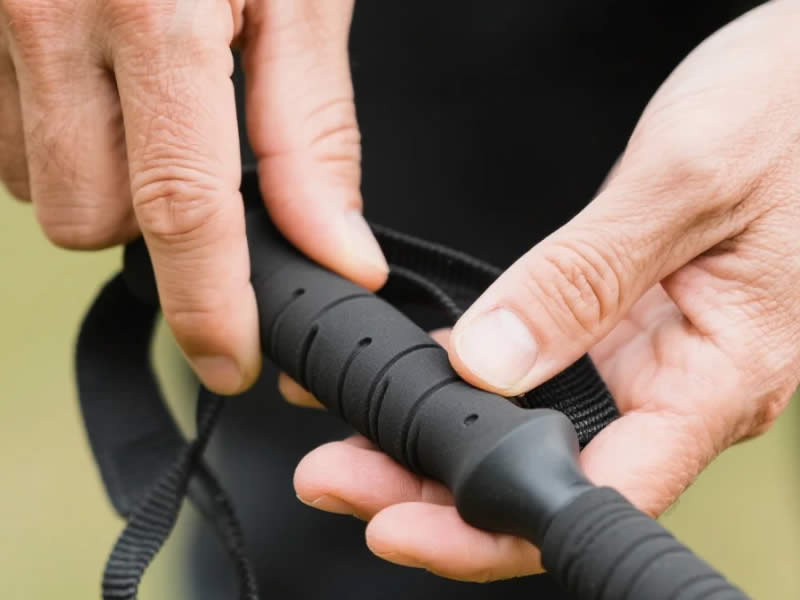
Step 4: Install the new grip
Option 1: Friction fit (no glue)
Some replacement grips are designed to stay on by friction alone, especially neoprene or slip‑on foam sleeves. Slide them onto the shaft with a twisting motion. They work but may rotate over time.
Option 2: Adhesive installation (recommended)
For a permanent, no‑slip fit:
- Apply a thin, even layer of epoxy (e.g., 5‑minute epoxy) or cyanoacrylate (super glue) to the shaft where the grip will seat. Alternatively, use contact cement on both the shaft and the inside of the grip, let it dry, then slide.
- Slide the grip onto the shaft quickly, twisting to spread the adhesive. Push it all the way to the original position (use an old grip as a reference for height).
- Align any ergonomic features (thumb rest, finger grooves) with your natural hand position.
- Wipe away squeezed‑out glue with a damp cloth.
- Let the adhesive cure for 24 hours before using the pole.
Option 3: Heat‑shrink foam grips
Some aftermarket grips are heat‑shrink tubes with foam texture. Slide the tube over the shaft, then apply heat (hair dryer or heat gun) – it shrinks tightly. No glue needed. These are great for DIY but may be less durable.
Step 5: Reattach the wrist strap
If you removed the wrist strap, reattach it according to your pole’s design (pin, screw, or slot). Ensure it is oriented correctly – the open side should face upward when your hand is inserted from below.
Step 6: Test your new grip
After the adhesive cures, take a short test hike. The grip should not rotate or slide. It should feel comfortable and secure. If it slips, you may need to remove and re‑glue with a stronger adhesive or use a grip‑locking tape underneath.
Common mistakes to avoid
- Using too much glue – Excess can seep out and make the grip sticky or harden into ridges.
- Burning foam grips – Keep heat away from cork and foam; they scorch easily. Use boiling water for those materials.
- Installing a grip that is too loose – If the grip slides on without resistance, it will never stay put. Use internal shims (electrical tape wrapped around the shaft) or buy the correct size.
- Forgetting the wrist strap orientation – A reversed strap makes adjustment impossible.
When to replace the entire pole instead
If your poles have integrated grip‑shaft bonding (e.g., some carbon one‑piece poles) or the shaft is rusted or cracked near the grip, replacement is not worthwhile. Also, if the pole locking mechanisms are failing, invest in new poles.
Pro tip: upgrade to cork or custom shapes
Cork grips are naturally anti‑slip when wet and conform to your hand over time. Foam grips are lightweight and warm in cold weather. Rubber grips offer durability but can be clammy. Choose based on your hiking conditions.
Final thoughts
Replacing trekking pole grip handles is a straightforward DIY project that takes 30 minutes and costs under $30. It restores comfort, control, and extends the life of poles you already trust. With the right tools – boiling water, sandpaper, and epoxy – you can transform worn, slippery handles into a like‑new feel. Just remember to match the grip diameter to your shaft, use heat carefully, and allow full curing time. Your hands (and your knees) will thank you on the next long descent.


