




How to use trekking poles for stream crossings in the Lake District?
Stream crossings are a common feature of Lake District walks – from the gentle trickles of the valleys to the fast‑flowing mountain streams after heavy rain. Using trekking poles correctly can make these crossings safer, more stable, and less intimidating. The key is to use two poles, plant them upstream (against the current), and maintain three points of contact at all times. Here is a step‑by‑step guide to crossing streams with poles.
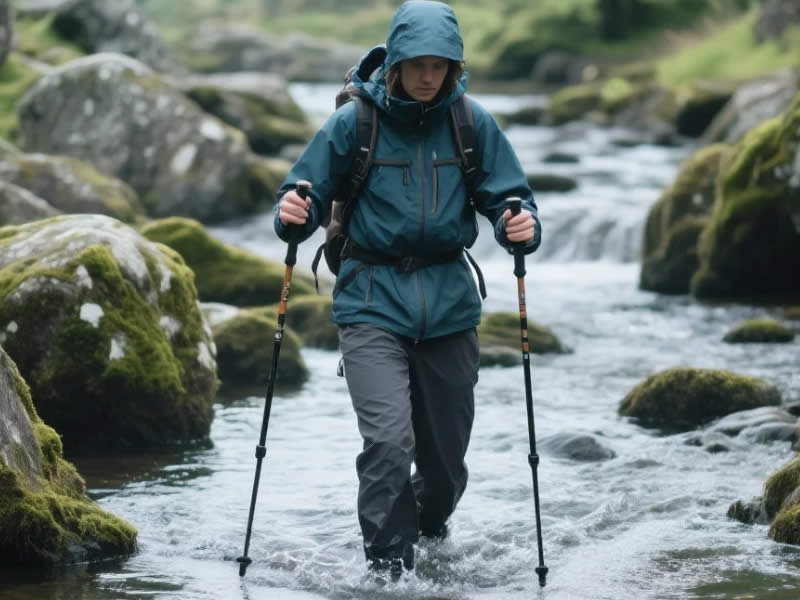
1. The upstream planting technique
When crossing a stream, face upstream (towards the direction from which the water is flowing). Plant both poles firmly on the streambed, slightly upstream of your feet. The water flowing against the poles pushes them into the streambed, creating a more secure hold. If you plant them downstream, the current can pull the poles away from you, reducing stability.
- Why upstream? – The water pressure pushes the pole tips into the ground, giving you a more stable plant.
- How to do it – Hold the poles at a slight angle, leaning slightly into the current. Your body should be angled upstream, with your weight slightly forward.
2. The tripod method – three points of contact
The tripod method is the safest way to cross a stream with poles:
- Start – Plant both poles in the streambed, shoulder‑width apart, upstream of your feet.
- Move one foot – Take a small, deliberate step with one foot, keeping the poles planted. You now have three points of contact (two poles + one foot).
- Move the other foot – Bring the other foot alongside, keeping the poles planted.
- Move one pole – Move one pole a short distance upstream, then the other pole.
- Repeat – Continue this rhythm: move a foot, move the other foot, move a pole, move the other pole.
This method ensures you always have three points of contact, reducing the risk of slipping on wet stones.
3. Pole length for stream crossings
On a crossing, you may want to lengthen your poles slightly (by 2–3 cm) to allow you to reach further ahead without leaning forward. This keeps your centre of gravity more stable. If the water is deep, you can extend the poles fully to test the depth before committing your weight.
4. Testing depth and stability
Before stepping into the water, use one pole to probe the streambed ahead. Test for:
- Depth – How deep is the water? If the pole sinks more than knee‑deep, consider a different crossing point.
- Substrate – Is the bottom firm (rock, gravel) or soft (mud, silt)? A soft bottom can be treacherous.
- Stability – Are the stones stable, or do they shift when you apply pressure?
5. Techniques for different stream types
- Shallow, slow streams – You can use a standard walking rhythm, planting each pole with the opposite foot.
- Fast, shallow streams – Use the tripod method, moving slowly and deliberately. Plant the poles firmly and shuffle sideways.
- Deep streams (above mid‑thigh) – Consider crossing with a partner, linking arms, and using the poles for extra support. For solo crossings, only attempt if you are confident and the water is not too fast.
6. Common mistakes to avoid
- Facing downstream – The current pushes your poles downstream, making them less effective.
- Planting poles too close together – A narrow base reduces stability. Plant shoulder‑width apart.
- Rushing – Stream crossings require patience. Take your time, move deliberately, and keep three points of contact.
- Using rubber tips – Remove rubber tips before crossing; they are slippery on wet rock. Use the bare carbide tip for grip.
- Not adjusting length – On uneven streambeds, adjust your pole length to maintain a comfortable, stable position.
7. Drying and maintenance after crossing
- Shake off water – After crossing, shake the poles to remove excess water.
- Dry the locks – If your poles have lever locks, open them slightly to allow moisture to evaporate.
- Check tips – Inspect the carbide tips for damage from stones.
- Rinse with fresh water – If you crossed a stream with high mineral content, rinse the poles to prevent corrosion.
8. When to avoid a crossing
- Water above mid‑thigh – The current is stronger and can sweep you off your feet.
- Fast‑flowing, brown water – This often indicates a recent storm, and the water level may be rising.
- No visible bottom – If you cannot see the streambed, you cannot assess depth and stability.
- Alone and unsure – If you are solo and uncertain, find an alternative route (e.g., a bridge or a wider, shallower crossing).
9. Practice
Before a real crossing, practice the tripod method on a shallow, slow stream or even on dry ground. Get comfortable with the rhythm of moving one limb at a time, and you will cross with confidence and safety.
10. Final verdict
Trekking poles are an essential tool for stream crossings in the Lake District. Face upstream, plant both poles firmly, use the tripod method to maintain three points of contact, and move deliberately. Adjust your pole length as needed, test the ground with a probe, and take your time. With the right technique, you can cross even the faster streams safely and confidently, protecting your balance and your gear.




