




How to use trekking poles for scrambling on Grade 1 ridges in the UK?
For Grade 1 scrambling (e.g., Crib Goch, Striding Edge, the Aonach Eagach), use your poles on the approach and descent only—stow them for the exposed sections. On the approach, use poles as balance aids, shortening them by 5 cm for stability on steep, uneven ground. On the scramble itself, collapse and stow your poles securely on your pack—you need both hands free for the rock. On the descent, lengthen the poles for braking on loose scree and rocky paths. Practice quick deployment and stowage before the route so you can transition smoothly. For narrow ridges, a single pole can help with balance, but two are a hindrance. Always check that your poles are securely stowed—a loose pole on a scramble can be a hazard to you and to those below. This article provides a detailed guide to using trekking poles on Grade 1 ridges, from the approach to the descent.
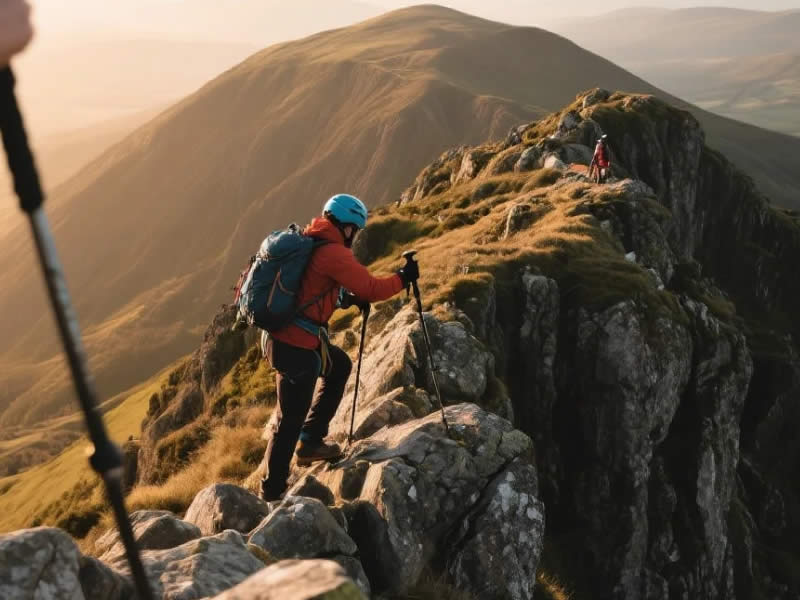
1. What is a Grade 1 scramble?
A Grade 1 scramble is a route that involves using your hands for balance and support, but does not require technical climbing skills or rope protection. In the UK, classic Grade 1 scrambles include:
- Crib Goch (Snowdonia) – A narrow, exposed knife‑edge ridge with steep drops on both sides.
- Striding Edge (Lake District) – A rocky ridge leading to Helvellyn, with exposed sections and a steep descent.
- Aonach Eagach (Glen Coe) – A narrow, rocky ridge with exposed sections and a challenging descent.
- Sharp Edge (Lake District) – A narrow, rocky arête on Blencathra.
These routes require good balance, steady nerves, and the ability to move confidently on rock. Trekking poles are useful on the approach and descent, but are not used on the exposed sections.
2. On the approach – using poles for stability
The approach to a Grade 1 scramble often involves steep, rough terrain—loose scree, grassy slopes, and rocky paths. On these sections, poles are invaluable:
- Shorten your poles – Reduce your pole length by about 5 cm compared to your flat‑ground setting. This lowers your centre of gravity and improves stability on the uneven ground.
- Use the diagonal stride – Plant the left pole with the right foot, and vice versa, to maintain a steady rhythm.
- Plant deliberately – On loose scree, plant the pole firmly to test the ground before committing your weight.
- Use rubber tips on road sections – If the approach involves a road or hard path, fit rubber tips to save your carbide tips.
3. At the scramble – stowing your poles
When you reach the exposed ridge or rock section, collapse and stow your poles. You need both hands free for balance and support.
- Collapse the poles – Fully collapse your poles (if folding) or shorten them to their minimum length (if telescoping).
- Stow them on your pack – Use the side compression straps, the front pocket, or a dedicated pole holder to secure them. Ensure they are fastened tightly—a loose pole can snag on a rock or drop onto someone below.
- Check the tips – Ensure the carbide tips are covered or facing inwards to prevent them from catching on clothing or pack fabric.
- Practice – Practice stowing and deploying your poles at home or on a gentle slope before the scramble. On a ridge, you need to do it quickly and without fuss.
4. On the descent – using poles for braking
The descent from a Grade 1 scramble is often on loose scree, steep grass, or rocky paths. On these sections, poles are essential for knee protection and stability.
- Lengthen your poles – Extend your poles by 5–10 cm (compared to flat‑ground length) to create a braking effect.
- Plant ahead – Plant the pole ahead of your feet and push down to brake your speed. This reduces the impact on your knees and helps you stay upright on loose ground.
- Use a double plant on steep sections – On very steep, loose descents, plant both poles together and use them as a brake.
5. On the ridge – using a single pole (optional)
On some wide, less exposed sections of a Grade 1 scramble, you may be able to use a single pole for balance while keeping one hand free for the rock. This is only advisable if:
- The ridge is relatively wide and not too exposed.
- You are confident in your balance and pole handling.
- The pole does not get in the way of your foot placement.
On narrow, exposed ridges (e.g., Crib Goch), it is safer to stow both poles.
6. Safety considerations
- Secure stowage – Ensure your poles are securely fastened to your pack. On a scramble, a loose pole can catch on a rock, unbalance you, or fall onto a walker below.
- Protect the tips – Use rubber tip covers or tape to prevent the carbide tips from damaging your pack fabric or catching on clothing.
- Check for snags – Before starting the scramble, check that no part of the pole or strap is loose and likely to snag on rock.
- Helmet – On exposed ridges, consider wearing a helmet. A loose pole falling from above could be a hazard.
7. Practice and preparation
Before a Grade 1 scramble, practice:
- Stowing and deploying – Practice collapsing and stowing your poles quickly, both standing still and walking.
- Using poles on rough ground – Practice using poles on loose scree and steep grass to get used to the feel.
- Adjusting length – Practice shortening and lengthening your poles on the go, using lever locks or twist locks.
8. Final verdict
On a Grade 1 scramble, use your poles on the approach and descent, and stow them securely on the exposed sections. Shorten on the approach for stability, lengthen on the descent for braking, and collapse them completely for the scramble itself. Practice your transitions before the route, and ensure your poles are securely fastened to your pack. With the right preparation, your poles will be a valuable aid on the approach and descent, and safely out of the way on the exposed ridge. This approach will allow you to move confidently and safely on some of the UK's most spectacular mountain routes.




