




How to use trekking poles for balance on icy paths in the Cairngorms?
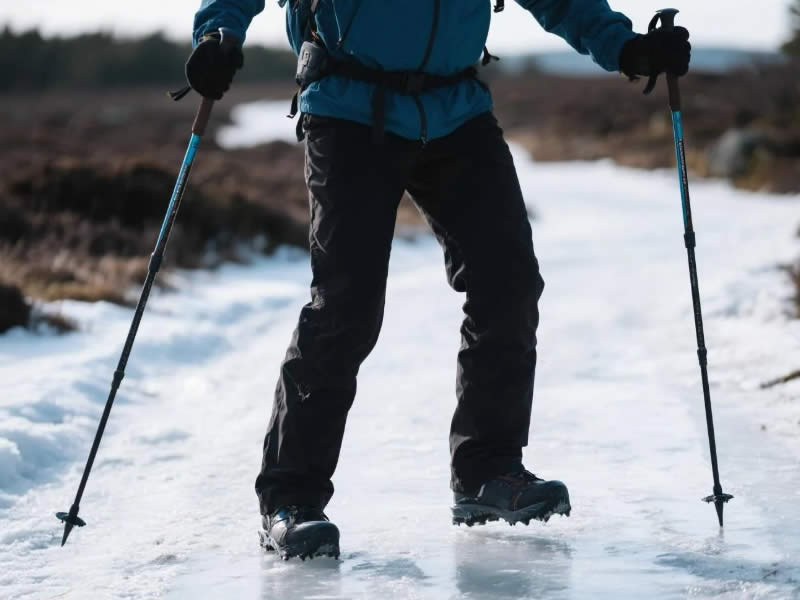
For icy paths in the Cairngorms, use trekking poles with carbide tips and snow baskets to improve stability and safety. Lengthen poles by 2–3 cm, plant them vertically with a firm push to bite into the ice, and keep your weight centred over your feet. Use a steady, alternating rhythm—planting ahead gives you more time to react if you slip. On steep icy sections, use a double plant: plant both poles together, push down, and move one foot at a time. For hard, polished ice, consider adding carbide‑tipped ice grips (spikes) that fit over the standard tip. Remove rubber ferrules and fit snow baskets—they prevent the pole from sinking into soft snow patches. On very steep, continuous ice, microspikes (crampons) for your boots are essential—poles are a support aid, not a substitute for proper traction. Practice on gentle icy slopes before tackling exposed ridges like the Aonach Eagach or the Cairngorm plateau.
1. Understanding icy paths in the Cairngorms
The Cairngorms in winter are a different world—snow, ice, and freezing conditions create challenging terrain. Paths can be covered in hard, polished ice (often called "névé" or ice crust) or a mix of soft snow and hidden icy patches. The wind can be extreme, and visibility can drop suddenly. In these conditions, balance is critical—and trekking poles are an essential tool for safety.
2. Equipment essentials for icy conditions
a. Carbide tips – The standard tungsten carbide tip is your primary grip. On ice, it will bite into small irregularities in the surface. Replace worn tips before a winter walk—a blunt tip will skid on ice.
b. Snow baskets – Fit snow baskets (larger than standard mud baskets) to prevent the pole from sinking into soft snow. On icy paths, you may encounter patches of soft snow; the basket keeps the pole on the surface. Remove baskets on hard ice to avoid catching.
c. Ice grips (spikes) – For hard, polished ice, you can fit a carbide‑tipped ice grip over the standard tip. These are small spikes that screw over the pole tip and provide much better traction on solid ice. They are sold by brands like Black Diamond and Leki, and are essential for winter walking on exposed ridges.
d. Lengthen poles – On icy ground, a slightly longer pole (2–3 cm longer than your flat‑ground length) allows you to plant ahead more effectively, giving you more time to react if you slip.
3. Technique for icy paths
a. Plant vertically – On ice, plant the pole vertically (straight down) rather than at an angle. A vertical plant drives the tip directly into the ice, maximising grip.
b. Firm push – Push down firmly as you plant. This forces the carbide tip into the ice, creating a secure anchor.
c. Alternating rhythm – Use the standard diagonal stride (left pole with right foot, right pole with left foot). This gives you continuous support. On ice, the rhythm should be steady and deliberate—no rushing.
d. Double plant on steep sections – On steep icy sections, use a double plant: plant both poles together ahead of your feet, push down, and move one foot at a time. This gives you maximum stability.
e. Test the ground – Before each step, tap the ice with your pole to test its firmness. This is particularly important on slopes where the ice may be thinner or more polished.
4. When to use ice grips (spikes)
- Polished ice – If the path is covered in hard, smooth ice (often found on exposed ridges or where meltwater has refrozen), fit the carbide spikes.
- Mixed snow and ice – On alternating sections, you may need to switch between the standard tip and the spike. This can be time‑consuming, so anticipate the conditions.
- Steep slopes – On steep icy slopes, the spikes are essential for maintaining grip.
5. When to use microspikes on your boots
- Continuous ice – If the path is ice for more than a few hundred metres, microspikes on your boots are essential. Poles alone are not enough on steep, continuous ice.
- Exposed ridges – On the Aonach Eagach or the Cairngorm plateau, continuous ice sections are common. Microspikes provide the traction your boots need, while poles provide stability.
- Winter conditions – In the Cairngorms, winter conditions are unpredictable. Carry microspikes even if the forecast is mild—they may save you from a slip.
6. Common mistakes on ice
- Planting too far ahead – On ice, overreaching can cause you to lose balance if the pole slips. Plant close to your feet.
- Using rubber tips – Rubber ferrules have no grip on ice. Remove them completely.
- Rushing – On icy paths, slow down. The rhythm should be deliberate, not rushed.
- Not using snow baskets – On patches of soft snow, a pole without a basket can sink deep, throwing you off balance.
- Ignoring microspikes – Some walkers rely solely on poles on ice. On steep sections, microspikes are essential for safety.
7. Practice on gentle slopes
Before you tackle exposed ridges, practice your icy‑path technique on a gentle, safe slope. Get used to the feel of the pole on ice, the firm push, and the rhythm. This will build your confidence for more exposed sections.
8. Safety reminders for the Cairngorms
- Check the forecast – The Cairngorms weather can change rapidly. Check the avalanche forecast and the wind speed before heading out.
- Carry a map and compass – Visibility can drop to zero in snow. Do not rely on GPS alone.
- Wear appropriate layers – Winter conditions require warm, waterproof clothing.
- Tell someone your route – Always leave a route plan with someone responsible.
9. Final verdict
Trekking poles are an essential aid for balance on icy paths in the Cairngorms. Use sharp carbide tips, fit snow baskets, and consider carbide spikes for hard ice. Lengthen your poles slightly, plant vertically, and push down firmly. Use a steady, alternating rhythm, and double plant on steep sections. For continuous ice, microspikes on your boots are essential. Practice on gentle slopes, and always respect the conditions. With the right equipment and technique, you can navigate icy paths safely and enjoy the spectacular winter scenery of the Cairngorms.




