




How to fully disassemble and deep‑clean trekking poles after muddy treks?
You’ve just finished a spectacular hike through the Atlantic Forest or the muddy trails of Serra da Mantiqueira. Your trekking poles are caked in brown sludge, and you’re tempted to just hose them down and lean them in the corner. That’s a mistake. Mud isn’t just dirt—it contains fine silicates, organic acids, and moisture that work together to corrode aluminium, delaminate carbon fibre, and jam locking mechanisms. A quick rinse only removes surface grime; the real damage hides inside the joints, under the baskets, and within the locking expanders. To keep your poles functioning safely for years, you need a thorough disassembly and deep‑clean routine. This guide walks you through every step, with pro tips that manufacturers don’t always tell you.
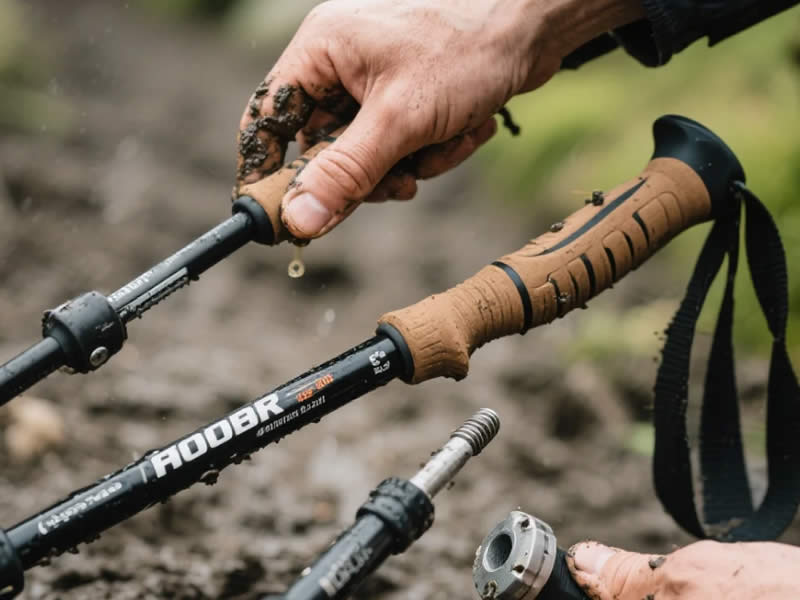
Why a deep clean matters more than you think
Mud traps moisture against metal surfaces. Even anodised aluminium can develop pitting corrosion if salt or acidic compounds are left to sit. Carbon fibre poles are vulnerable to abrasion—grit acts like sandpaper every time you twist or extend the sections. Locking mechanisms (twist‑expanders and lever‑cams) rely on clean, friction‑predictable surfaces. A layer of dried mud alters the coefficient of friction, causing either slippage or excessive tightness that stresses the tube walls. Moreover, moisture seeps into the tiny gap between the inner and outer tubes; if you store poles assembled, that moisture causes galvanic corrosion where dissimilar metals meet. A 15‑minute deep clean after every muddy trek prevents all these issues and extends pole life by years.
What you’ll need
- Warm water and mild dish soap (avoid harsh detergents that can strip anodising).
- A soft‑bristled brush (old toothbrush works perfectly) and a bottle brush or pipe cleaner for internal cleaning.
- Microfiber cloths or lint‑free towels.
- Isopropyl alcohol (rubbing alcohol) for degreasing.
- Dry lubricant: graphite powder or candle wax (never oil).
- Rubber gloves (optional) and a clean work surface.
- A ruler or callipers to note section lengths for reassembly.
Step 1 – Pre‑clean before disassembly
Do not disassemble a muddy pole immediately—you’ll grind grit into the threads and locking surfaces. First, extend the pole fully and rinse it under a gentle stream of water (not high pressure, which can force water into sealed areas). Use a cloth to wipe off the bulk of the mud. This prevents loose dirt from falling inside during disassembly.
Step 2 – Separate every section
Most trekking poles consist of 2 or 3 telescoping sections. Completely detach them:
- For twist‑locks: loosen the collar fully until the inner section slides out freely.
- For lever‑locks: open the lever completely and slide the sections apart.
- Remove the baskets (unscrew or pull off, depending on design).
- Remove the carbide tip if it’s a screw‑on type; press‑fit tips are usually left in place but should be wiped clean.
Now you have individual tubes, locking hardware, and small components. Keep them organised by position (top, middle, lower) to avoid mixing parts if they are not identical.
Step 3 – Clean each tube inside and out
Fill a basin with warm water and a few drops of dish soap. Submerge each tube and use the soft brush to scrub the exterior, paying special attention to the overlapping areas where mud accumulates. For the inside, dip the bottle brush or pipe cleaner into the soapy water and push it through the tube’s full length. Rotate it to dislodge dried mud flakes. If your pole has internal ridges or threads, scrub them gently.
Rinse every tube with clean, running water until the water runs clear. Shake out excess water and dry with a microfiber cloth. Then, leave the tubes upright on a towel for at least 30 minutes to allow any residual moisture in the seams to evaporate.
Important: Never use abrasive pads or steel wool on anodised aluminium—they scratch the protective layer. For carbon fibre, avoid any solvent that isn’t water‑based; acetone or petrol can attack the epoxy resin.
Step 4 – Deep‑clean the locking mechanisms
This is the most critical and most overlooked step.
For twist‑locks:
- Unscrew the expander nut from the inner tube (if your model allows). Some are fixed; if so, clean them in place.
- Soak the expander in warm soapy water and scrub with a toothbrush, focusing on the threads and the split‑cone surfaces.
- Rinse and dry thoroughly. Use a toothpick to remove mud from the expansion slots.
- Do not lubricate the expander itself with any liquid. Graphite powder can be lightly dusted on the threads to prevent galling, but never on the cone that grips the inner wall.
For lever‑locks:
- Open the lever and remove the cam plate if possible (check the manufacturer’s instructions).
- Clean the cam surfaces and the plastic friction pad with a toothbrush and soapy water.
- Dry completely. Apply a tiny dab of silicone grease only to the pivot pin—not to the gripping face.
For baskets and tips:
- Scrub baskets with a brush; remove any vegetation or stone wedged in the prongs.
- If tips are removable, clean the threads and apply a thin coat of anti‑seize compound (or a drop of light oil, but wipe it off) to prevent seizing—however, for the gripping surface of the tip, keep it clean and dry.
Step 5 – Final degrease and dry
After washing, wipe all metal surfaces with a cloth dampened with isopropyl alcohol. This removes any soap film and evaporates residual water. Ensure every part is bone‑dry—moisture trapped in the lock assembly will cause rust on steel springs and screws. Use compressed air (or a hairdryer on cool setting) to blow out hidden crevices.
Step 6 – Lubricate sliding surfaces correctly
This is where many hikers make a fatal error: they apply oil. Instead, use:
- Graphite powder – sprinkle a tiny amount on the inner tube’s sliding zone, then spread with a cloth. Wipe off excess—only a micro‑film should remain.
- Candle wax – rub a plain paraffin candle over the inner tube, then assemble and twist to distribute. Wax repels water and reduces friction without attracting dirt.
Apply nothing to the lock’s gripping area—that must stay clean and dry to hold firmly.
Step 7 – Reassemble and adjust
Insert the sections in the correct order (usually top→middle→bottom). For twist‑locks, tighten the collar just enough to hold your weight, then back off a quarter‑turn. For lever‑locks, adjust the screw tension so that the lever closes with firm resistance (about 2‑3 cm of lever travel). Test each section individually by pushing down with body weight—the pole should not slip.
Reattach baskets and tips securely. If your tips are press‑fit, tap them gently with a rubber mallet to ensure they are fully seated.
Step 8 – Final inspection and storage
Extend the poles to your preferred hiking length and lock them. Stand on the poles (or press them against a wall) to verify stability. Listen for squeaks—if you hear any, it indicates residual moisture or grit; repeat cleaning on that joint.
Store the poles disassembled—never locked together. Lay them flat in a dry, ventilated area, away from direct sunlight. If you store them in a stuff sack, ensure they are completely dry to avoid mildew.
Common mistakes to avoid
- Using WD‑40 or oil – we’ve covered this; it ruins locks.
- Forgetting to dry inside – moisture trapped inside the tube can cause internal corrosion that you can’t see until it’s too late.
- Mixing up sections – upper and lower sections have different diameters; if you swap them, they won’t lock.
- Over‑tightening during reassembly – this stresses the tube and can cause ovalisation.
- Skipping the dry lubricant – a clean, unlubricated joint may still squeak; graphite or wax makes the sliding action smooth and silent.
How often to deep‑clean
- After every hike in wet or muddy conditions – full disassembly.
- After dry, dusty hikes – a partial clean (wipe external surfaces and blow out dust) every 3‑4 trips.
- At least once a season, even if unused – to prevent storage corrosion.
Final word
Your trekking poles are precision instruments that endure incredible abuse. Mud, grit, and moisture are their biggest enemies. By investing 20 minutes in a proper disassembly and deep‑clean routine, you’ll not only eliminate squeaks and prevent lock failure, but you’ll also maintain the smooth telescoping action that makes hiking enjoyable. Treat your poles with the same care you give your boots and your backpack—they’ll reward you with countless safe, comfortable miles.
Now, roll up your sleeves, gather your brushes, and give your poles the spa day they deserve. Happy cleaning!




