




How to use trekking poles on icy trails in Pico da Bandeira during winter?
Use carbide tips, lengthen poles, and plant vertically to bite into ice. Remove rubber ferrules—carbide grips, rubber slides. Lengthen poles by 5 cm for descents (braking) and shorten by 5 cm for ascents (leverage). Use a steady alternating rhythm (left pole with right foot). On steep icy sections, use a double plant: plant both poles together and move one foot at a time. Fit snow baskets to prevent sinking into soft snow. In very icy conditions, add microspikes to your boots—poles alone are not enough. Keep weight centred, take short steps, and test each plant before committing. Avoid carbon poles (brittle in cold) and twist locks (freeze). Leki Makalu or Decathlon Forclaz MT900 with lever locks are ideal. For Pico da Bandeira's icy winter descents, extend poles, plant vertically, and use double plant for stability.
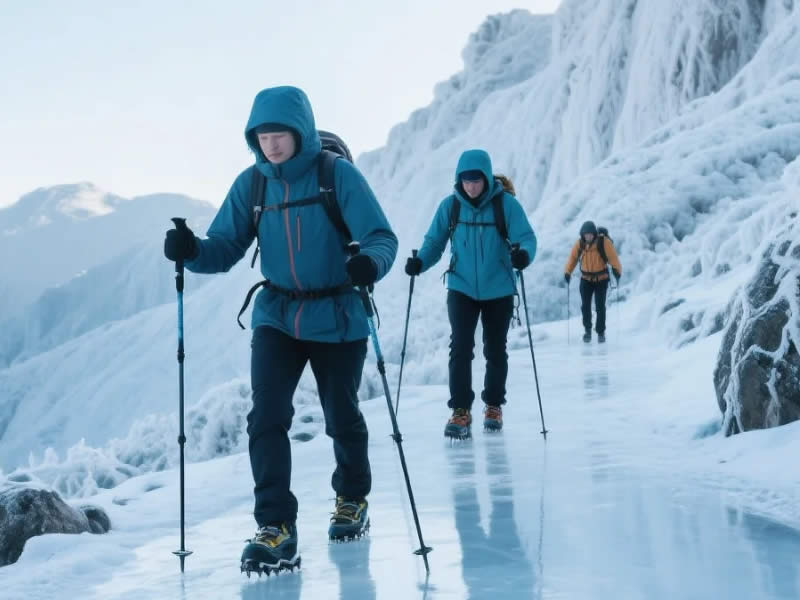
1. Understanding Pico da Bandeira's winter conditions
Pico da Bandeira, at 2,892 metres, is Brazil's third highest peak. In winter (June–August), temperatures can drop well below freezing, and the trails can be covered in ice, frost, and occasional snow. The descent is particularly treacherous—steep, icy, and exposed. A slip on an icy section can be dangerous. The right technique and equipment are essential for safety and confidence.
2. Preparation – setting up your poles
Before you step onto the icy trail, prepare your poles:
a. Remove rubber ferrules – Rubber tips have no grip on ice. They slide. Remove them and use the bare carbide tip for traction on frosty rock and ice.
b. Check carbide tips – The tips must be sharp. A blunt tip will skid on ice. If they are worn, replace them before the walk. Carry a spare pair in your pack.
c. Lengthen for descents – On icy descents, extend your poles by 5 cm compared to your flat‑ground length. This allows you to plant the tip ahead of your feet, creating a braking effect that reduces knee impact and prevents slips.
d. Shorten for ascents – On icy ascents, shorten your poles by 5 cm for better leverage.
e. Fit snow baskets – If there is soft snow on top of the ice, fit snow baskets to prevent the pole from sinking into the snow. They are essential for walking on snowy paths.
3. Technique for icy trails
a. Plant vertically – On ice, plant the pole vertically (straight down) rather than at an angle. A vertical plant drives the carbide tip directly into the ice, maximising its bite and preventing skidding.
b. Push down firmly – As you plant, push down firmly through the wrist strap. This "seats" the tip into the ice, giving you a secure anchor. A light plant will skid.
c. Take short steps – On ice, short, deliberate steps keep your centre of gravity stable and reduce the chance of a slip. Avoid long strides.
d. Use the alternating rhythm – On moderate slopes, use the standard alternating rhythm (left pole with right foot, right pole with left foot). On steep sections, switch to a double plant.
e. Double plant on steep sections – On steep icy descents, plant both poles together ahead of your feet, push down firmly, and move one foot at a time. This gives you maximum stability and braking.
f. Test each plant – Before committing your weight, test the ground with the pole tip. If the tip skids, the surface is very slippery—adjust your footing or find a more stable spot to plant.
4. Traversing icy slopes
When crossing a slope of ice or frost:
a. Face the slope – Angle your body slightly towards the hill, not directly across.
b. Plant the uphill pole first – Plant the uphill pole first, push down firmly, then plant the downhill pole. The uphill pole acts as a brake, preventing you from sliding downhill.
c. Keep your weight back – Lean slightly into the hill. This keeps your weight over your feet and reduces the risk of slipping.
d. Short, deliberate steps – Take short, controlled steps. On ice, a long stride can cause you to lose balance.
5. Additional safety considerations
a. Microspikes – On continuous steep ice, microspikes (crampons for your boots) are essential. Poles are a support aid, not a substitute for traction. Microspikes provide the grip your boots need.
b. Test the ground – Before stepping, tap the ice with your pole. A sharp, hard sound means it is solid; a softer sound may indicate a thin layer of ice over rock.
c. Good footwear – Poles are not a substitute for boots with good grip. Wear boots with an aggressive tread.
d. Take breaks – Use your poles for support when resting.
6. Equipment for Pico da Bandeira winter
- 7075 aluminium poles – The best material for winter. Aluminium bends but rarely breaks. Carbon is brittle and can splinter on side impacts.
- Lever locks – Reliable in cold conditions; twist locks can freeze and slip.
- Cork grips – Comfortable in cold, damp conditions; become tacky when damp.
- Carbide tips – Essential for icy rock; replace when blunt.
- Snow baskets – Prevent sinking in soft snow.
- Microspikes – For icy descents and traverses.
7. What to avoid
- Carbon fibre – Can splinter on side impacts in cold conditions.
- Twist locks – Can freeze or become difficult to operate with gloves.
- Rubber tips – No grip on ice—remove them.
- Rushing – On ice, speed is your enemy. Take short, deliberate steps.
- Ignoring the warning signs – If you feel your feet starting to slide, stop, plant your poles firmly, and reassess.
8. Pro tips for Pico da Bandeira
- Start early – To avoid afternoon ice melt and refreeze, start early in the morning.
- Check the forecast – Icy conditions are more common after a cold front.
- Use a double plant on descents – This is the most effective technique for steep icy sections.
- Carry spare tips – Frost and rock wear them fast.
- Wear layers – It's cold at the summit; warm up as you descend.
- Stay on the trail – Ice can hide loose rocks.
9. Final verdict
On Pico da Bandeira's icy winter trails, the key is to use sharp carbide tips, lengthen your poles for descents, and plant vertically. The double‑plant technique on steep sections gives you maximum stability and braking. Fit snow baskets, carry spare tips, and add microspikes for your boots. With the right equipment and technique, you can tackle the icy trails with confidence and safety. Happy (and safe) winter hiking!




