




Do I need trekking poles for Chapada Diamantina’s Cachoeira da Fumaça trail?
Cachoeira da Fumaça (Smoke Waterfall) is one of Brazil's most spectacular natural wonders—a 340‑metre cascade that plunges into a canyon, creating a misty veil that appears to smoke in the wind. The trail to reach it, located in the Chapada Diamantina National Park in Bahia, is equally dramatic. But as you prepare for this iconic hike, you're probably wondering: do I really need trekking poles? The answer is not strictly mandatory, but strongly recommended for most hikers. In this detailed guide, I'll break down the trail's challenges, explain exactly where and how poles help, and help you decide based on your fitness and experience.
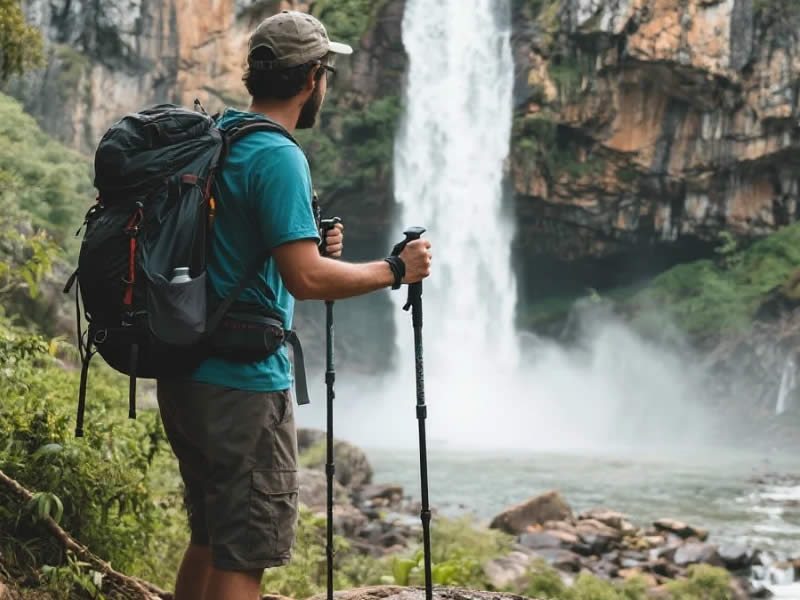
Understanding the Cachoeira da Fumaça trail
The classic route to Cachoeira da Fumaça starts from the Vale do Capão village and is typically done as a 6‑kilometre round trip (some versions include a longer loop). The key characteristics are:
- Steep elevation change – You descend roughly 600 metres from the plateau to the canyon floor, then climb back up. That's a substantial drop over a short distance.
- Loose scree and gravel – The trail is infamous for its unstable surface. Many sections consist of small, loose quartzite fragments that shift underfoot like marbles.
- Exposed, hot conditions – The trail has little shade, and the return climb is a relentless, sun‑baked grind. Dehydration and fatigue are real risks.
- Rocky steps and boulders – Parts of the trail require stepping over large rocks or navigating natural stone steps.
- The final scramble – If you opt to go right to the base of the waterfall (rather than viewing from the lookout), there's a short, steeper scramble that involves using your hands.
This profile makes it clear: the challenge is not distance—it's the vertical and the terrain.
Where poles are a huge advantage
1. The steep descent
Going down the scree slope is surprisingly harder than going up. Your knees absorb shock with every step, and your ankles work overtime to stabilise on the shifting gravel. Poles planted ahead of you on the descent act as brakes, taking weight off your joints and preventing that jarring, stop‑start motion. If you have any history of knee pain, this alone justifies bringing them.
2. Uphill propulsion
On the return climb, you're tired, hot, and maybe a bit dehydrated. Poles let you engage your arms and back, turning the ascent into a full‑body workout rather than just a leg‑burner. Plant them ahead of you and push; you'll find the pace more sustainable and your quads less shredded.
3. Stability on loose terrain
The marble‑like scree is the trail's most notorious hazard. A misplaced foot can send you sliding. With poles, you can probe the stability of each step before committing your weight. The two extra contact points dramatically reduce the risk of falls and twisted ankles.
4. Water crossings
Depending on the season, you may encounter small streams or water‑logged sections. Poles help you maintain balance and test the depth of muddy patches.
Where poles can be a hindrance
The final scramble to the base
If you choose to descend the last few metres to the waterfall's plunge pool, you'll need both hands free for scrambling. Here, poles become awkward—you'll have to stow them on your backpack. This is a short section (maybe 10‑15 minutes), but it's worth noting.
On the rocky steps
The trail has some sections of natural rock staircases where poles can be more of a nuisance than a help. However, you can always collapse them and carry them for those brief stretches.
The verdict: who should bring them, who can skip
You should definitely bring poles if:
- You have any knee issues or previous joint injuries.
- You are over 40 (knee protection becomes more critical).
- You are not a regular hiker or have limited experience with steep, loose terrain.
- You are carrying a heavier daypack (water, snacks, camera gear).
- You simply want to reduce fatigue and enjoy the hike more.
You can skip poles if:
- You are young, fit, and have excellent balance.
- You are an experienced hiker who is comfortable on scree.
- You prefer to have your hands completely free for scrambling.
- You are hiking very light (just water and a phone).
For the majority of visitors, however, the benefits far outweigh the minor inconvenience. Many hikers I've spoken to on the trail say their only regret was not bringing poles—especially on the climb back up.
What kind of poles work best for this trail
- Aluminium with flick‑locks – The trail is abrasive; carbon fibre can chip. Aluminium 7075 is durable. Flick‑locks are easy to adjust with sweaty hands.
- Large baskets – The loose gravel and occasional mud make small baskets inadequate. Use 7‑cm baskets to prevent sinking.
- Cork grips – The Chapada is hot and dry; cork wicks sweat and prevents your hands from slipping.
- Carbide tips with spare tips – The quartzite is sharp and will wear down tips quickly. Bring a spare set.
- Lightweight – under 280g per pole – You'll be swinging them for 2–3 hours; lighter is better.
Recommended models: Black Diamond Trail Pro, Leki Makalu, or Decathlon Forclaz MT900—all in aluminium with flick‑locks.
Essential tips for hiking with poles on this trail
- Adjust height for the descent – Lengthen poles by 5‑7 cm for the downhill to increase braking leverage.
- Shorten for the ascent – On the climb back, shorten them to the standard elbow‑90° height.
- Store them for the final scramble – Practice collapsing and attaching them to your pack quickly.
- Use rubber ferrules on the slick rock – Some sections of smooth rock can be slippery; rubber tips provide better traction than carbide on polished surfaces.
- Keep them clean – The trail dust is fine and abrasive; wipe the locking mechanisms before adjusting to avoid wear.
What local guides say
I asked several guides in Vale do Capão about poles. Their advice is unanimous: "For 90% of tourists, we recommend poles. It's not about being weak—it's about being smart. We see people struggling with the climb every day, and many say they wished they'd had poles." One guide added, "The trail is not technically difficult, but the loose gravel makes it tiring. Poles turn a hard hike into a pleasant one."
Alternatives if you don't have poles
- A sturdy wooden stick – You can sometimes find a fallen branch at the trailhead. It's not as effective but better than nothing.
- Hire a local guide – They often carry spare poles or can offer physical support on tricky sections.
- Use the handrail – Some steep sections have rope or chain supports; use them wisely.
Final recommendation
Yes, you should bring trekking poles for the Cachoeira da Fumaça trail. They are not essential in the sense that the hike is impossible without them—but they will transform a challenging, knee‑jarring descent and a gruelling, sun‑baked climb into a safer, more enjoyable experience. For the modest extra weight and minimal cost, the payoff in comfort, stability, and knee protection is enormous.
So pack your lightweight aluminium poles with cork grips, large baskets, and spare tips. Adjust them correctly for the descent and ascent. Practice stowing them for the final scramble. And then enjoy one of Brazil's most breathtaking waterfalls—without the aching knees that might otherwise sour the memory. Bom caminho!




