




Do trekking poles help with balance when carrying a heavy DSLR camera in the field?
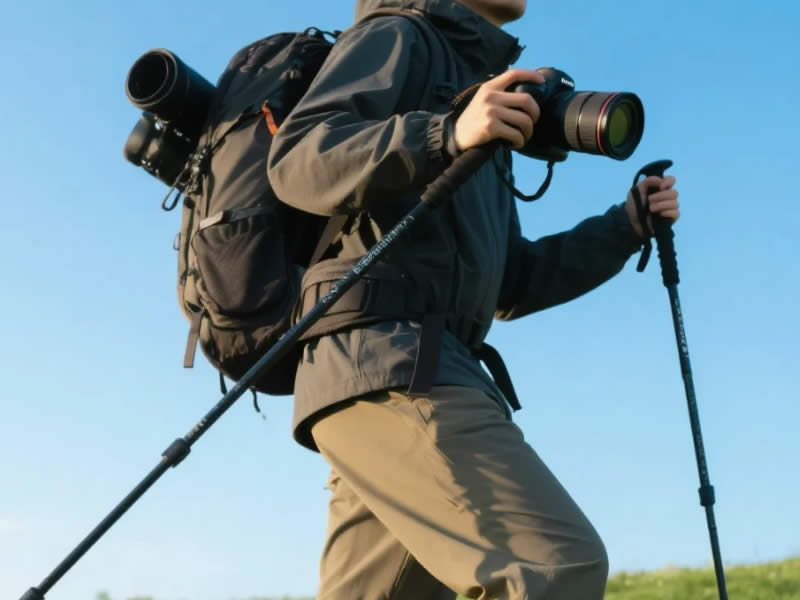
Yes—trekking poles significantly improve balance when carrying a heavy DSLR camera in the field. By providing a third point of contact, a pole creates a stable tripod base that frees your hands for the camera while offering crucial support on slopes, loose ground, and uneven terrain. It also transfers weight from your spine to the ground, reducing back fatigue and allowing you to hold the camera steadier for sharper shots. For wildlife and landscape photographers, a trekking pole is more than a walking aid—it is an essential piece of support gear.
Why balance is more challenging with a heavy camera
A full-frame DSLR with a telephoto lens (e.g., a 70‑200mm f/2.8 or a 100‑400mm) can weigh 2‑3 kg or more. This weight is concentrated at the front of your body, shifting your centre of gravity forward. When you're walking on uneven ground—rocky paths, muddy trails, or steep slopes—this forward weight makes it harder to maintain your balance. Your legs work harder, your back aches, and your risk of a fall increases.
A trekking pole addresses this by providing a third point of contact. With two feet and one pole on the ground, you create a tripod effect, which is far more stable than standing on just two feet. This is especially important when you stop to compose a shot, as you can brace yourself with the pole while adjusting your camera settings.
The balance benefits for photographers
1. Stable platform for shooting
When you plant a trekking pole and lean it slightly forward, you can rest your camera on the pole (or use it as a brace). This reduces camera shake and allows you to hold the camera steady for longer periods, especially when waiting for wildlife to move into position. The pole acts as a rudimentary monopod, providing stability without the weight of a dedicated camera support.
2. Reduced back fatigue
Carrying a heavy camera places strain on your lower back, as your spine has to counterbalance the forward weight. A trekking pole transfers some of this load from your spine to the ground. By leaning on the pole, you can relieve pressure on your lumbar spine, reducing fatigue and allowing you to walk longer distances without discomfort.
3. Improved stability on descents
Descending a steep slope with a heavy camera is hazardous. The forward weight makes you prone to leaning forward, which can cause a fall. With a trekking pole planted ahead of you, you can brake your descent and maintain an upright posture, keeping your centre of gravity over your feet.
4. Free hands for composition
When you are composing a shot, you need both hands free—one to adjust the camera settings, the other to support the lens. A trekking pole provides a stable, hands‑free support, allowing you to frame your shot without fumbling or rushing.
Choosing the right pole for photography
1. Flick‑locks over twist‑locks
For photography, flick‑locks (lever‑locks) are essential. They are far more secure than twist‑locks, which can slip under the weight of a heavy camera. The ability to lock the pole firmly at a specific length is critical for stability.
2. A stiff, durable shaft
Aluminium poles are more rigid and offer a more stable base than carbon fibre. Carbon fibre can flex under load, which may cause vibration when using a telephoto lens. Aluminium 7075‑T6 is the best choice for a stable camera support.
3. A comfortable, ergonomic grip
Cork grips are the best choice for photography. They are comfortable for long periods, wick moisture, and provide a secure hold even when your hands are sweaty or cold.
4. Rubber ferrule (tip cover)
For use on rock or hard ground, a rubber ferrule provides a quieter and more stable base than a carbide tip. It also prevents the tip from damaging fragile rock surfaces.
Practical technique for photographers
1. Use the pole as a monopod
When you are standing still to take a shot, plant the pole vertically in front of you. Hold the camera with your left hand (supporting the lens) and use your right hand to press the camera against the pole (or rest the lens on the pole). This creates a stable, three‑point contact.
2. Brace the pole against your leg
On a slope, you can brace the pole against your leg, creating a rigid triangle between your body, the pole, and the ground. This is particularly effective for low‑angle shots.
3. Use a quick‑release mount
Some photographers attach a small, lightweight monopod head (e.g., a small ball head or a tilt head) to the top of the pole. This allows you to pan and tilt the camera without moving the pole itself.
4. Keep the pole short
For static photography, keep the pole slightly shorter than your standing height. This allows you to brace it against the ground and press your camera against it without over‑reaching.
Limitations and alternatives
1. Dedicated monopod
For professional use, a dedicated monopod (e.g., from Manfrotto or Gitzo) is more stable than a trekking pole. It has a stiffer shaft, a better head, and can support heavier lenses. However, it is heavier and less versatile than a trekking pole.
2. Camera‑specific trekking poles
Some trekking poles come with a 1/4"‑20 camera screw built into the top cap, allowing you to attach the camera directly. This is a good compromise, but the connection is less stable than a proper monopod head.
3. A small tripod
For stationary use, a lightweight tripod is the most stable option. However, it is also the heaviest and least portable.
Summary table
| Support Method | Stability | Weight | Portability | Best For |
|---|---|---|---|---|
| Trekking pole | Moderate | Very light | Excellent | Moving shots, quick support |
| Dedicated monopod | High | Moderate | Good | Heavy telephoto lenses |
| Small tripod | Very high | Heavy | Poor | Stationary, long‑exposure shots |
The verdict
A trekking pole is a valuable tool for improving balance when carrying a heavy DSLR camera in the field. It provides a third point of contact, reduces back fatigue, and allows you to steady your camera for sharper shots. For the best results, choose a sturdy aluminium pole with a flick‑lock, a comfortable cork grip, and consider adding a small monopod head or a quick‑release mount. While a dedicated monopod offers superior stability, a trekking pole is far more versatile and will already be in your hand. With the right technique, your pole becomes an extension of your camera kit—offering support, stability, and a more comfortable walk.




