




How to attach trekking poles to a backpack when not in use?
You're halfway up a steep, rocky scramble – the terrain is too technical for poles, and you need your hands free. Or you've reached a flat, wide moorland section where you want to walk pole‑free for a while. Either way, you need to stow your trekking poles quickly and securely. Attaching them to your backpack seems simple, but if done carelessly, they'll swing, jab you in the ribs, snag on branches, or even fall off without you noticing. This guide covers every carry method – side, back, diagonal, and dedicated holders – with step‑by‑step instructions, pack compatibility tips, and pro tricks to keep your poles safe and silent when they're not in your hands.
Before you start – collapse and protect
Always collapse your poles fully before stowing. For telescopic poles, unlock each section, slide them together, and re‑lock gently (just enough to hold). For folding Z‑poles, fold them into their compact bundle.
Critical step: Fit the rubber tip protectors over the carbide tips. This prevents the sharp tips from puncturing your backpack fabric, scratching your face or gear, or injuring someone behind you on a narrow path. If you've lost the protectors, wrap the tips in a thick sock or tape them with duct tape.
Method 1: Side carry – the most common and versatile
Most backpacks have side compression straps – horizontal webbing straps on the sides (usually two per side). Here's how to use them:
- Position the poles – hold them collapsed, handles upward, tips downward. The handle should be at the top (closer to your shoulder) for easy grabbing.
- Slide them vertically – place the bundle against the side of your pack, between the compression straps and the pack body.
- Secure the straps – tighten the upper compression strap over the handles, and the lower strap over the lower section (just above the tips). Adjust so the poles are snug against the pack.
- Check for swing – give the pack a gentle shake. The poles should not move independently. If they wobble, tighten the straps or reposition the poles.
Pros: Quick access – you can grab the handle without removing the pack. Keeps weight balanced (one pole each side is ideal).
Cons: Can catch on overhanging branches if the trail is narrow. The tips may poke your leg if not covered.
Variation: If your pack has only one side compression strap, you can use a single strap plus the daisy chain or gear loops to secure the lower section with a small carabiner or cord.
Method 2: Back panel carry – for sleek, snag‑free stowing
Many modern backpacks feature a dedicated pole attachment – an elastic bungee cord or a fabric sleeve on the back panel (between the pack and your back). This is the cleanest method.
- Collapse poles and bundle them together.
- Slide them vertically down the back panel, between the pack and the external mesh pocket (if fitted).
- Hook the bungee cord over the handles (usually there's a loop or toggle). The tips rest in a small pocket at the bottom.
- Tighten the bungee to hold firmly.
If your pack doesn't have a dedicated system, you can improvise:
- Use the side compression straps but route them across the back panel (if they're long enough).
- Use the top lid strap and the bottom sleeping bag straps to secure the poles vertically along the back.
Pros: Extremely stable – poles are sandwiched against your back, so they don't swing or snag. Weight is central, improving balance.
Cons: You usually need to remove the pack to access them – not ideal for frequent on‑off use.
Method 3: Diagonal carry – the scrambling favourite
For walkers who repeatedly stow and retrieve poles on technical terrain (e.g., scrambling sections), a diagonal carry across your chest or shoulder offers quick access.
- Collapse poles and keep them bundled.
- Position diagonally – one end near your left hip, the other crossing your chest to your right shoulder (or vice versa).
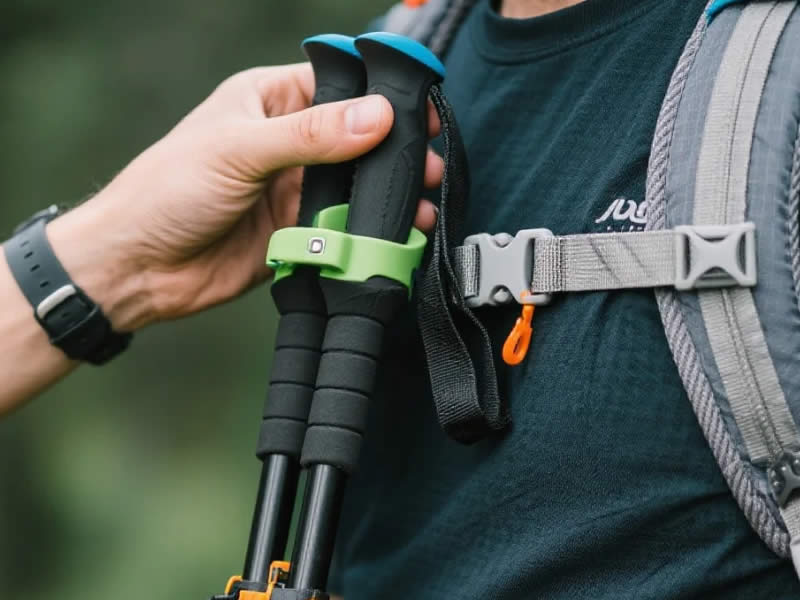
- Use a shoulder strap loop – thread the poles through the webbing loop on your backpack's shoulder strap (many packs have an elastic cord or a fabric loop for this purpose).
- Secure the lower end – attach it to your hip belt or a side compression strap with a small carabiner or velcro strap.
Variation: Some ultralight packs have a magnetic toggles system – you just snap the pole shaft into a magnetic clip on your shoulder strap.
Pros: Quicker than side or back carry – you can grab the pole from your shoulder without removing the pack.
Cons: Poles can interfere with arm movement if not positioned carefully. The lower end may swing if not firmly secured.
Method 4: Dedicated pole holders – aftermarket solutions
If your pack lacks effective attachment points, consider these add‑ons:
- Elastic pole holders – simple bungee loops that clamp around the shaft and clip onto daisy chains. Brands like Zpacks, Gossamer Gear, and Sea to Summit make them.
- Magnetic clips – attach to your shoulder straps; the pole snaps into place and releases with a tug.
- Trekking pole quivers – a sleeve that holds both poles together, worn on the back of your pack or as a separate sling (e.g., the popular "Pack‑a‑Pole" holder).
These cost £10‑25 and can transform a pack without attachment points into a pole‑friendly system.
Which method suits which situation?
| Situation | Best method |
|---|---|
| Frequent on/off (e.g., scrambles) | Diagonal carry or side carry with quick‑release straps |
| Long flat sections with no need for poles | Back panel carry (out of the way) |
| Narrow, overgrown paths | Back panel carry (reduces snagging) |
| Rocky descents where you may need poles again soon | Side carry – one hand can retrieve without stopping |
| Trail running or fastpacking | Dedicated quiver or front diagonal carry |
Pro tips for secure and silent attachment
- Bundle the pair together – use a velcro strap or rubber band to keep them as a single unit. This prevents rattling.
- Orient tips downward and handles upward – always. This prevents the tips from sliding through gaps and keeps the heavier grips at the top for balance.
- Tighten straps but not too tight – over‑tightening can bend the shaft. Just snug enough to prevent movement.
- Check after 10 minutes – straps can loosen as you walk. Give the poles a tug and re‑tighten if needed.
- Use a carabiner for security – even after strapping, clip a small carabiner through the pole strap and a pack loop as a backup – especially on rugged terrain.
- Cover the tips – rubber protectors are essential; if you lose them, wrap with cloth and tape.
- Avoid carrying loose poles – never just shove them into the main compartment or an external pocket without securing – they'll shift and possibly damage your gear.
Pack compatibility – what if my pack doesn't have straps?
If your backpack is minimalist (no side compression, no bungee), you can still attach poles:
- Use the top lid closure and the bottom daisy chain – run a piece of shock cord through these to create a vertical carry.
- Use aftermarket pole loops – clip onto any webbing loop.
- Use volumetric compression – pack your sleeping bag or clothes tightly so the poles can be wedged between the back panel and the main compartment (but this is less secure – only for short sections).
Common mistakes to avoid
- Leaving tips exposed – a sharp carbide tip can puncture your pack, your leg, or your tent.
- Carrying poles unfolded – extended poles are unwieldy and dangerous to others.
- Using only one strap – two points of contact are essential; one strap allows rotation and swing.
- Attaching to the hip belt – poles dangling from your waist will hit your thighs with every step – uncomfortable and inefficient.
- Forgetting to loosen locks before folding – pressure changes in flight or prolonged storage can make twist‑locks seize.
On‑trail example – a typical transition
You're descending a steep scree slope and need both hands for balance. You pause, collapse your poles, slip on tip protectors, and stow them in the side carry. After the scree, you reach a gentle ridge where you want to use poles again. With side carry, you simply reach down, unclip the lower strap, and pull the poles out while still walking – a seamless transition that takes seconds.
Final thought – practice at home
The best way to master pole attachment is to practise at home. Load your pack with your typical gear, attach the poles, and walk around the house or garden. Shake, jog, and bend – check if they stay put. Adjust your method until you find a system that's secure, quiet, and quick. Then, on the hill, you'll be able to stow and retrieve your poles without breaking rhythm – and that's when they truly become a seamless part of your walking kit.




