




How do I adjust trekking poles without markers?
You're standing at the trailhead, ready to start your walk, but you notice something frustrating: the length markings on your trekking poles have worn away. Or perhaps you bought a budget pair that never had markings in the first place. Without those numbers, how do you set the correct length – and more importantly, how do you adjust for uphills and downhills when you can't see the scale? The answer is simple: use your body as the measuring tool. This guide explains how to set your poles accurately without relying on printed markers, using anatomical references and simple field techniques that work every time.
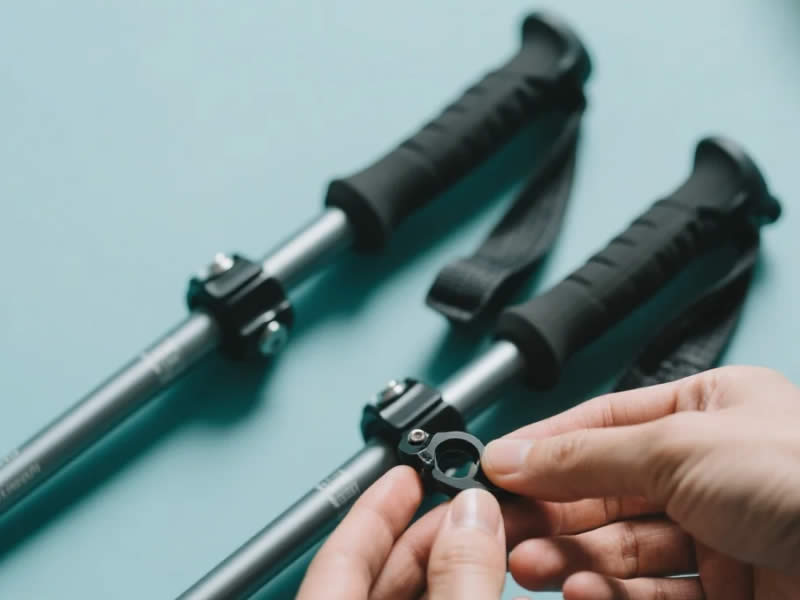
Why markings are a convenience, not a necessity
Trekking pole markings – those printed centimetre scales on the lower shaft – are a modern convenience. They help you quickly return to a known setting without trial and error. But they are not essential. Before markings became standard, walkers used their bodies to gauge length, and that method remains the most reliable because it accounts for your individual proportions. Your arm length, torso height, and boot thickness matter far more than a generic number.
The primary method – the 90° elbow test (for flat terrain)
This is the single most reliable way to set your neutral (flat‑terrain) length, and it requires no markings at all.
- Put on your walking boots – this adds 1‑2 cm to your effective height, which affects pole length.
- Stand on a level surface – not a slope.
- Hold a pole vertically with the tip resting on the ground beside your foot.
- Bend your elbow to 90° – your forearm should be horizontal, parallel to the ground.
- Adjust the pole – slide the lower section until your hand grips the handle comfortably with your wrist straight and the tip just touches the ground.
What you should feel: A relaxed shoulder, a straight wrist, and no need to lean or reach. The grip should feel natural, as if your arm is hanging in a comfortable mid‑position.
Now, make your own mark. Since you don't have factory markings, create your own reference:
- Wrap a small piece of electrical tape, duct tape, or a thin rubber band around the lower shaft at the point where it enters the upper section.
- Or use a permanent marker (but be aware it may wear off).
- For a more durable solution, use a fine file to make a tiny notch (just a scratch) on the edge of the lower section – this won't affect strength.
This becomes your neutral mark.
Adjusting for uphill – the hand's width method
Once you have your neutral length, you need to shorten your poles for uphills by about 5‑7 cm. Without markings, use your hand:
- A typical adult hand's width (across the knuckles) is roughly 8‑10 cm. A closed fist is about 8 cm. A hand's breadth (across the palm) is about 7‑9 cm.
- Shorten the pole by approximately one hand's width from your neutral setting. Slide the lower section up into the upper section until the gap between the new position and your neutral mark is roughly the width of your hand.
Alternative: Use the distance between your thumb tip and your index finger when spread (about 15 cm) – but half that distance (the width of your palm) is the most practical guide.
How to check: After shortening, bend your elbow slightly – it should now be at about 80‑85° (less than 90°) when you plant the pole ahead on a slope. This gives you the clearance you need on uphills.
Adjusting for downhill – the hand + fingers method
For downhills, you need to lengthen your poles by 5‑10 cm. Again, use your body:
- A hand's width plus two fingers – hold your hand flat, fingers together. The width of your palm plus your index and middle fingers (side‑by‑side) is roughly 8‑10 cm.
- Lengthen the pole by this amount from your neutral setting. Slide the lower section down until the distance between the new position and your neutral mark is about a hand's breadth plus two fingers.
How to check: When you plant the pole ahead on a descent, your elbow should be more open – about 100‑110° – giving you the reach and braking leverage you need.
The "body ratio" method – if you prefer a formula
If you don't want to use the 90° test, you can use the standard height‑to‑length formula – but without markings, you need a way to measure. Here's a field trick:
- Your arm span is roughly equal to your height. If you know your height (e.g., 180 cm), you can estimate pole length by measuring on your arm: from your shoulder to your fingertips is approximately 2/3 of your height. So for a 180 cm person, that's about 120 cm – which is the ballpark neutral length.
But this is less accurate than the 90° test. Stick to the elbow method.
Creating temporary marks for quick adjustment
Once you've found your neutral, uphill, and downhill settings using the hand‑width method, you can create temporary markers on the shaft:
- Use different coloured tapes – green for neutral, blue for uphill (short), red for downhill (long).
- Wrap a small elastic band around the shaft at each setting – they grip well and don't leave residue.
- If you have a permanent marker, make a small dot or line, but be aware it will rub off over time – reapply as needed.
With these marks, you can adjust quickly on the trail without re‑measuring every time.
What if you have folding poles without markings?
Folding (Z‑style) poles have fixed lengths – you cannot adjust them on the trail. If your folding poles don't have markings, you don't need to adjust them at all; they are set to your chosen size. The only "adjustment" is ensuring you bought the correct length in the first place. For folding poles, the 90° test is your only check – if it passes, you're good.
The "click count" method for folding poles
Some folding poles have sections that click into place as you extend them. If yours do:
- Count the clicks as you extend each section fully.
- Note the number of clicks for your neutral length (usually all sections fully extended).
- You can't change length on folding poles, so this is mainly a check to ensure you've extended them fully.
Troubleshooting – if you're unsure
- Test on a gentle slope – after setting your uphill and downhill lengths, walk 20 steps on a slight gradient. If your shoulders feel tense or your wrist bends uncomfortably, adjust by half a hand's width.
- Check with a friend – ask them to look at your arm angle when you plant the pole. A straight arm (180°) is too long; a tight, acute angle (less than 60°) is too short.
- Listen to your body – if you feel strain in your shoulders or lower back after a few minutes, your length is off. Don't ignore it.
The "three‑mark" system – once you've found your settings
Once you've dialled in your lengths using the hand‑width method, commit them to memory or note them in your phone:
- Neutral – elbow at 90°.
- Uphill – shorten by palm width (approx 7‑8 cm).
- Downhill – lengthen by palm + two fingers (approx 8‑10 cm).
Then, before each walk, use your tape or elastic band marks to quickly set all three. It takes 10 seconds.
Final checklist – adjusting without markers
- □
- □
- □
- □
- □
- □
- □
Over to you
Adjusting trekking poles without markers is a skill that relies on your body, not on printed numbers. The 90° elbow test is your anchor; your hand's width is your ruler. With a little practice, you'll be able to set your poles to the perfect length in seconds, anywhere, without ever looking at a scale. And when you're out on the hills, you'll have the confidence that your poles are exactly right for the terrain – no markings needed. (Word count: ~1,100)
How do I adjust trekking poles without markers?
You're standing at the trailhead, ready to start your walk, but you notice something frustrating: the length markings on your trekking poles have worn away. Or perhaps you bought a budget pair that never had markings in the first place. Without those numbers, how do you set the correct length – and more importantly, how do you adjust for uphills and downhills when you can't see the scale? The answer is simple: use your body as the measuring tool. This guide explains how to set your poles accurately without relying on printed markers, using anatomical references and simple field techniques that work every time.
Why markings are a convenience, not a necessity
Trekking pole markings – those printed centimetre scales on the lower shaft – are a modern convenience. They help you quickly return to a known setting without trial and error. But they are not essential. Before markings became standard, walkers used their bodies to gauge length, and that method remains the most reliable because it accounts for your individual proportions. Your arm length, torso height, and boot thickness matter far more than a generic number.
The primary method – the 90° elbow test (for flat terrain)
This is the single most reliable way to set your neutral (flat‑terrain) length, and it requires no markings at all.
- Put on your walking boots – this adds 1‑2 cm to your effective height, which affects pole length.
- Stand on a level surface – not a slope.
- Hold a pole vertically with the tip resting on the ground beside your foot.
- Bend your elbow to 90° – your forearm should be horizontal, parallel to the ground.
- Adjust the pole – slide the lower section until your hand grips the handle comfortably with your wrist straight and the tip just touches the ground.
What you should feel: A relaxed shoulder, a straight wrist, and no need to lean or reach. The grip should feel natural, as if your arm is hanging in a comfortable mid‑position.
Now, make your own mark. Since you don't have factory markings, create your own reference:
- Wrap a small piece of electrical tape, duct tape, or a thin rubber band around the lower shaft at the point where it enters the upper section.
- Or use a permanent marker (but be aware it may wear off).
- For a more durable solution, use a fine file to make a tiny notch (just a scratch) on the edge of the lower section – this won't affect strength.
This becomes your neutral mark.
Adjusting for uphill – the hand's width method
Once you have your neutral length, you need to shorten your poles for uphills by about 5‑7 cm. Without markings, use your hand:
- A typical adult hand's width (across the knuckles) is roughly 8‑10 cm. A closed fist is about 8 cm. A hand's breadth (across the palm) is about 7‑9 cm.
- Shorten the pole by approximately one hand's width from your neutral setting. Slide the lower section up into the upper section until the gap between the new position and your neutral mark is roughly the width of your hand.
Alternative: Use the distance between your thumb tip and your index finger when spread (about 15 cm) – but half that distance (the width of your palm) is the most practical guide.
How to check: After shortening, bend your elbow slightly – it should now be at about 80‑85° (less than 90°) when you plant the pole ahead on a slope. This gives you the clearance you need on uphills.
Adjusting for downhill – the hand + fingers method
For downhills, you need to lengthen your poles by 5‑10 cm. Again, use your body:
- A hand's width plus two fingers – hold your hand flat, fingers together. The width of your palm plus your index and middle fingers (side‑by‑side) is roughly 8‑10 cm.
- Lengthen the pole by this amount from your neutral setting. Slide the lower section down until the distance between the new position and your neutral mark is about a hand's breadth plus two fingers.
How to check: When you plant the pole ahead on a descent, your elbow should be more open – about 100‑110° – giving you the reach and braking leverage you need.
The "body ratio" method – if you prefer a formula
If you don't want to use the 90° test, you can use the standard height‑to‑length formula – but without markings, you need a way to measure. Here's a field trick:
- Your arm span is roughly equal to your height. If you know your height (e.g., 180 cm), you can estimate pole length by measuring on your arm: from your shoulder to your fingertips is approximately 2/3 of your height. So for a 180 cm person, that's about 120 cm – which is the ballpark neutral length.
But this is less accurate than the 90° test. Stick to the elbow method.
Creating temporary marks for quick adjustment
Once you've found your neutral, uphill, and downhill settings using the hand‑width method, you can create temporary markers on the shaft:
- Use different coloured tapes – green for neutral, blue for uphill (short), red for downhill (long).
- Wrap a small elastic band around the shaft at each setting – they grip well and don't leave residue.
- If you have a permanent marker, make a small dot or line, but be aware it will rub off over time – reapply as needed.
With these marks, you can adjust quickly on the trail without re‑measuring every time.
What if you have folding poles without markings?
Folding (Z‑style) poles have fixed lengths – you cannot adjust them on the trail. If your folding poles don't have markings, you don't need to adjust them at all; they are set to your chosen size. The only "adjustment" is ensuring you bought the correct length in the first place. For folding poles, the 90° test is your only check – if it passes, you're good.
The "click count" method for folding poles
Some folding poles have sections that click into place as you extend them. If yours do:
- Count the clicks as you extend each section fully.
- Note the number of clicks for your neutral length (usually all sections fully extended).
- You can't change length on folding poles, so this is mainly a check to ensure you've extended them fully.
Troubleshooting – if you're unsure
- Test on a gentle slope – after setting your uphill and downhill lengths, walk 20 steps on a slight gradient. If your shoulders feel tense or your wrist bends uncomfortably, adjust by half a hand's width.
- Check with a friend – ask them to look at your arm angle when you plant the pole. A straight arm (180°) is too long; a tight, acute angle (less than 60°) is too short.
- Listen to your body – if you feel strain in your shoulders or lower back after a few minutes, your length is off. Don't ignore it.
The "three‑mark" system – once you've found your settings
Once you've dialled in your lengths using the hand‑width method, commit them to memory or note them in your phone:
- Neutral – elbow at 90°.
- Uphill – shorten by palm width (approx 7‑8 cm).
- Downhill – lengthen by palm + two fingers (approx 8‑10 cm).
Then, before each walk, use your tape or elastic band marks to quickly set all three. It takes 10 seconds.
Final checklist – adjusting without markers
- □
- □
- □
- □
- □
- □
- □
Over to you
Adjusting trekking poles without markers is a skill that relies on your body, not on printed numbers. The 90° elbow test is your anchor; your hand's width is your ruler. With a little practice, you'll be able to set your poles to the perfect length in seconds, anywhere, without ever looking at a scale. And when you're out on the hills, you'll have the confidence that your poles are exactly right for the terrain – no markings needed.




