




How to store trekking poles when not using for months?
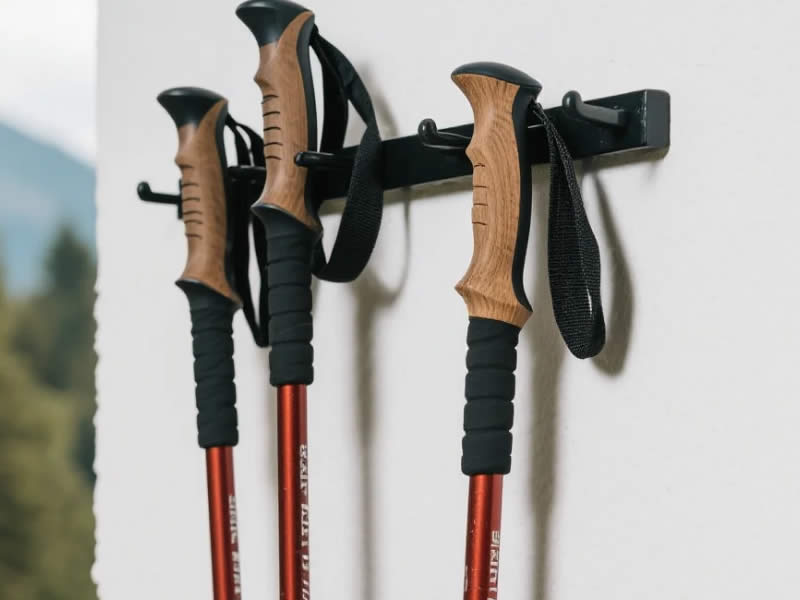
You've just returned from a fabulous week in the Lake District, or perhaps the walking season has ended and your poles are destined for the back of the cupboard until spring. It's tempting to just collapse them, shove them in a corner, and forget about them. But that's a mistake. Improper storage is one of the leading causes of premature failure in trekking poles—seized locks, corroded shafts, and degraded grips. This guide explains the correct way to store your poles for months at a time, ensuring they emerge from hibernation in perfect working order.
Why storage matters – the threats to your poles
When you store trekking poles for an extended period (several months or more), they face several silent threats:
- Corrosion – moisture trapped inside the joints can cause galvanic corrosion, especially between aluminium sections and steel locking hardware.
- Seizing – pressure from collapsed locks, combined with dried mud or grit, can cause sections to stick together, making extension impossible.
- Lock fatigue – spring tension in locking mechanisms can weaken over time if the pole is stored collapsed and locked.
- Grip degradation – sweat and oils left on cork or foam grips can break down the material, making them brittle or slippery.
- Tip damage – unprotected carbide tips can scratch other gear or dull prematurely from contact with hard surfaces.
A few minutes of proper storage preparation can save you the cost and frustration of a replacement.
Step 1: Clean thoroughly – don't store the mud
Before you even think about storage, your poles need a full clean. Here's a simple routine:
- Rinse – use cold water (not hot) to remove surface mud. Hot water can set stains and soften carbon resin.
- Scrub – use a soft brush to clean the locking mechanisms, the threads on twist‑locks, and the lower sections.
- Dry fully – this is the most critical step. Extend your poles to their full length and leave them in a warm, well‑ventilated room for at least 24 hours. Airing cupboard, conservatory, or near a radiator (but not touching) works well. Do not collapse them while damp—the moisture trapped between sections will cause corrosion.
Important: If you have folding (Z‑style) poles, extend them fully and let the cord and joints dry completely before folding.
Step 2: Lubricate – sparingly and correctly
A tiny amount of lubrication can prevent corrosion and keep locks moving smoothly after months of inactivity.
- For threaded parts (twist‑locks, baskets): apply a microscopic smear of silicone grease (not oil) to the threads. Oil attracts dirt, which will gum up the mechanism over time.
- For lever‑locks: a drop of silicone lubricant on the pivot point of the lever can keep it moving freely.
- For shafts: a light wipe with a silicone‑impregnated cloth (like a gun cloth) can provide a corrosion‑inhibiting film on the aluminium.
Caution: Do not lubricate the area where the twist‑lock wedge meets the inner wall—this can cause the pole to slip under load. Only lubricate moving parts and threads.
Step 3: Store extended – the most important rule
This is the single most effective storage practice: store your trekking poles fully extended (at their maximum length), with the locks loosened.
Why?
- Relieves tension – if you store poles collapsed with locks tight, the internal springs and wedges are under constant pressure. Over months, this can cause permanent deformation, leading to a loose lock that won't hold.
- Prevents sticking – if you store poles collapsed, the sections can seize together due to moisture or corrosion. When you next try to extend them, they may be stuck fast.
- Allows air circulation – extended poles allow any residual moisture to evaporate, reducing corrosion risk.
How to do it:
- Extend each pole to its full length (all sections out).
- Loosen the locks – for lever‑locks, open the lever fully; for twist‑locks, unscrew until the section moves freely.
- Place the poles in a dry, upright position if possible (e.g., in a corner, leaning against a wall). If you need to lay them flat, ensure they are on a clean, dry surface and not trapped under other heavy gear.
Exception for folding poles: Folding poles cannot be stored extended in the same way – they are either folded or extended. For folding poles, store them extended and unlocked (if they have a twist‑to‑lock system) and folded only if you are confident they are completely dry.
Step 4: Choose the right storage location
The environment matters. Ideal conditions:
- Cool, dry, and ventilated – a spare room, a cupboard inside the house, or a clean, heated garage.
- Consistent temperature – avoid extremes. Sheds and unheated garages can have wide temperature swings that cause condensation to form on the metal shafts.
- Low humidity – aim for a humidity level below 60%. If you store poles in a damp cellar, you'll invite corrosion.
What to avoid:
- Attics – extreme heat in summer can damage cork grips and soften carbon resin.
- Damp garages or sheds – temperature swings and high humidity accelerate corrosion.
- Under a sink – moisture from leaks or condensation is a risk.
- In direct sunlight – UV rays can degrade foam grips and fade anodised finishes.
Step 5: Protect tips – prevent scratches and dulling
Carbide tips are hard but can be damaged by contact with hard surfaces, or they can scratch your other gear. Store your poles with rubber tip protectors fitted. If you've lost them, wrap the tips in a thick sock or a piece of cloth and secure with an elastic band.
For folding poles, if you fold them for storage, ensure the tips don't touch each other or the shafts – a small piece of foam or a cloth between them prevents scratching.
Step 6: Check periodically – a 5‑minute "health check"
Even when stored correctly, it's wise to give your poles a quick inspection every 2‑3 months:
- Extend and collapse – run each section in and out a few times to keep the mechanisms moving and redistribute any lubricant.
- Check for tightness – if you notice any rust or sticking, address it immediately (a drop of penetrating oil, cleaned and re‑greased).
- Check locks – tighten a lever‑lock and check that it holds. If it slips, adjust the tension screw.
- Inspect grips – if cork has dried out, you can apply a very light coating of cork sealant (sold for wine corks) or simply wipe with a damp cloth. If foam is cracking, consider replacing the grip.
This simple check takes a few minutes and prevents surprises when you next pack for a walk.
What if you only have limited space?
If you need to store poles collapsed due to space constraints (e.g., a small flat), follow these modified steps:
- Clean and dry thoroughly – this is non‑negotiable.
- Collapse the poles but leave the locks loose – you want the sections sitting together, not locked in place.
- Place a small silica gel sachet inside the storage tube or bag to absorb any residual moisture.
- Check every 2 months – extend the poles fully to air them out, then re‑collapse.
This is a compromise, but it's acceptable if you have no other option.
Do not store poles with the straps tight
Wrist straps should be left loose and untangled. If you store poles with straps wrapped tightly around the grips, the strap material can stretch or become permanently kinked, affecting its fit. Simply let them hang loose.
Final checklist – before you put your poles away
- □
- □
- □
- □
- □
- □
- □
Over to you
Storing your trekking poles correctly is a small investment of time that can extend their life by years. The golden rule is simple: clean, dry, extend, loosen, and store in a stable environment. Follow these steps, and your poles will greet you with a smooth, reliable action when you next need them. And if you're putting them away for the winter, you can relax knowing they'll be ready for the spring hills. (Word count: ~1,080)
How to store trekking poles when not using for months?
You've just returned from a fabulous week in the Lake District, or perhaps the walking season has ended and your poles are destined for the back of the cupboard until spring. It's tempting to just collapse them, shove them in a corner, and forget about them. But that's a mistake. Improper storage is one of the leading causes of premature failure in trekking poles—seized locks, corroded shafts, and degraded grips. This guide explains the correct way to store your poles for months at a time, ensuring they emerge from hibernation in perfect working order.
Why storage matters – the threats to your poles
When you store trekking poles for an extended period (several months or more), they face several silent threats:
- Corrosion – moisture trapped inside the joints can cause galvanic corrosion, especially between aluminium sections and steel locking hardware.
- Seizing – pressure from collapsed locks, combined with dried mud or grit, can cause sections to stick together, making extension impossible.
- Lock fatigue – spring tension in locking mechanisms can weaken over time if the pole is stored collapsed and locked.
- Grip degradation – sweat and oils left on cork or foam grips can break down the material, making them brittle or slippery.
- Tip damage – unprotected carbide tips can scratch other gear or dull prematurely from contact with hard surfaces.
A few minutes of proper storage preparation can save you the cost and frustration of a replacement.
Step 1: Clean thoroughly – don't store the mud
Before you even think about storage, your poles need a full clean. Here's a simple routine:
- Rinse – use cold water (not hot) to remove surface mud. Hot water can set stains and soften carbon resin.
- Scrub – use a soft brush to clean the locking mechanisms, the threads on twist‑locks, and the lower sections.
- Dry fully – this is the most critical step. Extend your poles to their full length and leave them in a warm, well‑ventilated room for at least 24 hours. Airing cupboard, conservatory, or near a radiator (but not touching) works well. Do not collapse them while damp—the moisture trapped between sections will cause corrosion.
Important: If you have folding (Z‑style) poles, extend them fully and let the cord and joints dry completely before folding.
Step 2: Lubricate – sparingly and correctly
A tiny amount of lubrication can prevent corrosion and keep locks moving smoothly after months of inactivity.
- For threaded parts (twist‑locks, baskets): apply a microscopic smear of silicone grease (not oil) to the threads. Oil attracts dirt, which will gum up the mechanism over time.
- For lever‑locks: a drop of silicone lubricant on the pivot point of the lever can keep it moving freely.
- For shafts: a light wipe with a silicone‑impregnated cloth (like a gun cloth) can provide a corrosion‑inhibiting film on the aluminium.
Caution: Do not lubricate the area where the twist‑lock wedge meets the inner wall—this can cause the pole to slip under load. Only lubricate moving parts and threads.
Step 3: Store extended – the most important rule
This is the single most effective storage practice: store your trekking poles fully extended (at their maximum length), with the locks loosened.
Why?
- Relieves tension – if you store poles collapsed with locks tight, the internal springs and wedges are under constant pressure. Over months, this can cause permanent deformation, leading to a loose lock that won't hold.
- Prevents sticking – if you store poles collapsed, the sections can seize together due to moisture or corrosion. When you next try to extend them, they may be stuck fast.
- Allows air circulation – extended poles allow any residual moisture to evaporate, reducing corrosion risk.
How to do it:
- Extend each pole to its full length (all sections out).
- Loosen the locks – for lever‑locks, open the lever fully; for twist‑locks, unscrew until the section moves freely.
- Place the poles in a dry, upright position if possible (e.g., in a corner, leaning against a wall). If you need to lay them flat, ensure they are on a clean, dry surface and not trapped under other heavy gear.
Exception for folding poles: Folding poles cannot be stored extended in the same way – they are either folded or extended. For folding poles, store them extended and unlocked (if they have a twist‑to‑lock system) and folded only if you are confident they are completely dry.
Step 4: Choose the right storage location
The environment matters. Ideal conditions:
- Cool, dry, and ventilated – a spare room, a cupboard inside the house, or a clean, heated garage.
- Consistent temperature – avoid extremes. Sheds and unheated garages can have wide temperature swings that cause condensation to form on the metal shafts.
- Low humidity – aim for a humidity level below 60%. If you store poles in a damp cellar, you'll invite corrosion.
What to avoid:
- Attics – extreme heat in summer can damage cork grips and soften carbon resin.
- Damp garages or sheds – temperature swings and high humidity accelerate corrosion.
- Under a sink – moisture from leaks or condensation is a risk.
- In direct sunlight – UV rays can degrade foam grips and fade anodised finishes.
Step 5: Protect tips – prevent scratches and dulling
Carbide tips are hard but can be damaged by contact with hard surfaces, or they can scratch your other gear. Store your poles with rubber tip protectors fitted. If you've lost them, wrap the tips in a thick sock or a piece of cloth and secure with an elastic band.
For folding poles, if you fold them for storage, ensure the tips don't touch each other or the shafts – a small piece of foam or a cloth between them prevents scratching.
Step 6: Check periodically – a 5‑minute "health check"
Even when stored correctly, it's wise to give your poles a quick inspection every 2‑3 months:
- Extend and collapse – run each section in and out a few times to keep the mechanisms moving and redistribute any lubricant.
- Check for tightness – if you notice any rust or sticking, address it immediately (a drop of penetrating oil, cleaned and re‑greased).
- Check locks – tighten a lever‑lock and check that it holds. If it slips, adjust the tension screw.
- Inspect grips – if cork has dried out, you can apply a very light coating of cork sealant (sold for wine corks) or simply wipe with a damp cloth. If foam is cracking, consider replacing the grip.
This simple check takes a few minutes and prevents surprises when you next pack for a walk.
What if you only have limited space?
If you need to store poles collapsed due to space constraints (e.g., a small flat), follow these modified steps:
- Clean and dry thoroughly – this is non‑negotiable.
- Collapse the poles but leave the locks loose – you want the sections sitting together, not locked in place.
- Place a small silica gel sachet inside the storage tube or bag to absorb any residual moisture.
- Check every 2 months – extend the poles fully to air them out, then re‑collapse.
This is a compromise, but it's acceptable if you have no other option.
Do not store poles with the straps tight
Wrist straps should be left loose and untangled. If you store poles with straps wrapped tightly around the grips, the strap material can stretch or become permanently kinked, affecting its fit. Simply let them hang loose.
Final checklist – before you put your poles away
- □
- □
- □
- □
- □
- □
- □
Over to you
Storing your trekking poles correctly is a small investment of time that can extend their life by years. The golden rule is simple: clean, dry, extend, loosen, and store in a stable environment. Follow these steps, and your poles will greet you with a smooth, reliable action when you next need them. And if you're putting them away for the winter, you can relax knowing they'll be ready for the spring hills.




