




How to use trekking poles to reduce leg fatigue?
Leg fatigue is the great leveller of hillwalking. No matter how fit you are, after a few hours of steep ascents and jarring descents, your quads will burn, your calves will tighten, and your pace will slow. The simple answer to reducing this fatigue is to use your trekking poles actively, not passively. They are not just for balance—they are an engine that can take a significant load off your legs and transfer it to your arms and core. This guide explains the biomechanics, the specific techniques for different terrains, and the mental shift you need to make to turn your poles into a powerful fatigue‑fighting tool.
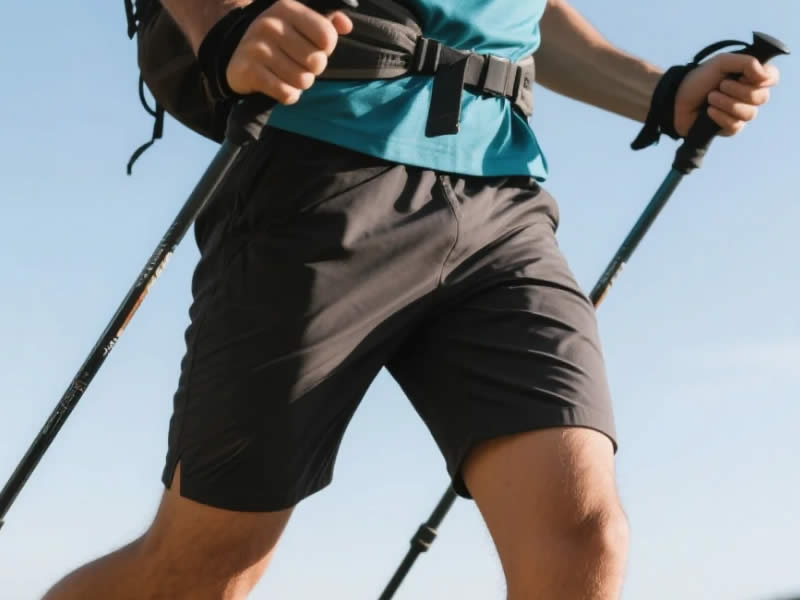
The Principle: Load Transfer
The fundamental concept behind reducing leg fatigue with poles is load transfer. Every step you take on a hill forces your leg muscles to work against gravity.
- On an Uphill: Your quadriceps and glutes are working hard to lift your body weight against the slope.
- On a Downhill: Your quadriceps act as brakes, absorbing the impact of each step. This is the most fatiguing and damaging action for your legs.
Trekking poles allow you to transfer a portion of this load from your legs to your arms, shoulders, and back. By actively pushing through the poles, you are effectively using your upper body to help your legs do the work.
Step 1: Master the Diagonal Gait
This is the foundational technique. It's the rhythm your arms naturally make when you walk without poles.
Left pole with right foot; right pole with left foot.
This isn't arbitrary. This diagonal gait creates a stable, alternating rhythm that helps you maintain balance. It's the most efficient and natural way to move. When you push with your left arm, your right leg is moving forward, creating a smooth, flowing motion that reduces the load on your spine.
Step 2: The "Plant, Push, and Glide" Technique
The planting action is not a single movement; it's a two‑part process that generates forward momentum.
- The Plant: As your foot moves forward, the pole tip touches the ground. The pole should be planted 30‑50 cm ahead of your foot, at a slight backward angle. This is the "where" of the technique.
- The Push: Immediately after the tip touches, you push down and back with your arm, using the strap as the primary lever. This is the "how" of the technique. The push should come from your shoulder and back, not just your wrist.
- The Glide: The push propels your body forward. The momentum carries you into the next stride.
The Key Thought: You are using the ground to create forward thrust. Your arms are not just moving up and down; they are actively contributing to your speed and efficiency.
Step 3: The "Load Transfer" on Uphills
On a steep ascent, the goal is to use your poles to pull yourself up, taking the load off your quads.
- The Technique: Shorten your poles by 5‑7 cm. Plant the pole ahead of you, and as you push, actively pull yourself up using the strap. This is a "pull" motion rather than a "push."
- The Result: You are using your arms to lift your body weight, which significantly reduces the work your legs have to do. It's like having an extra gear on the climb.
Step 4: The "Braking" on Downhills
On a descent, the goal is to use your poles as brakes, reducing the impact on your knees and quads.
- The Technique: Lengthen your poles by 5‑10 cm. Plant the pole ahead of your foot, and push down firmly. This creates a braking effect that absorbs the shock of your step.
- The Result: Your arms are acting as shock absorbers, protecting your knees and quads from the jarring impact that causes fatigue. This is where the "tripod" technique (planting both poles together) is most useful.
Step 5: The "Relaxed Grip" – Saving Energy
A tight, clenched grip is a massive drain on your energy.
- The Problem: You are using your forearm muscles to hold the pole, which is tiring.
- The Solution: The strap should be the primary load‑bearer. Your hand should be just a guide. Let the strap take your weight; your fingers should just be resting on the handle. On the backstroke, open your hand slightly. This saves your grip strength and reduces fatigue.
Step 6: Find Your Rhythm
The best way to fight fatigue is to find a steady, rhythmic pattern.
- Start Slow: On your first few walks with poles, focus on getting the diagonal gait correct.
- Listen to Your Body: Your rhythm will feel natural when you are moving efficiently. You shouldn't be fighting the poles.
- Practice on Flat Ground: Master the technique on a flat, easy path before you take it onto steep hills.
The Mindset Shift: "Propulsion" Over "Support"
This is the single biggest mental shift you need to make.
- The "Support" Mentality: You are leaning heavily on your poles, using them as a crutch to support your weight. This is tiring and inefficient. Your arms are working hard, but they are not contributing to forward motion.
- The "Propulsion" Mentality: You are using your poles to actively push you forward. The poles are like an extra set of legs, driving your body along the trail. This is the efficient, powerful, and correct way to walk with poles. When you adopt this mindset, your poles become an engine that drives you forward, taking the strain off your legs.
A Quick Terrain Guide
| Terrain | Pole Adjustment | Technique | Benefit |
|---|---|---|---|
| Uphill | Shorten by 5‑7 cm | Pull yourself up | Reduces quad strain |
| Downhill | Lengthen by 5‑10 cm | Brake with poles | Reduces knee impact |
| Flat | Neutral length | Maintain rhythm | Sustains pace |
| Muddy | Neutral length | Test ground, maintain balance | Prevents slips |
Common Mistakes That Increase Fatigue
- Gripping Too Tightly: This exhausts your forearms.
- Planting Too Late: You miss the power stroke.
- Planting Too Close: You get no propulsion.
- Swinging Poles in Arcs: You waste energy.
- Using Poles as Crutches: You don't transfer any load.
Summary Checklist
- □
- □
- □
- □
- □
- □
Over to You
Using trekking poles to reduce leg fatigue is a skill that transforms your walking experience. It's about turning your poles from a simple aid into a powerful engine that shares the workload. By mastering the diagonal gait, actively pushing through the strap, and adjusting your technique for the terrain, you can walk further, faster, and with far less leg pain. Your legs will thank you.




