




How tight should trekking pole straps be?
Loose enough to slide a finger under, but not so loose that they don't support you. This is the golden rule. When you're gripping the handle, you should be able to fit just one finger between the strap and the back of your hand. This simple test is the key to unlocking the full potential of your trekking poles.
The correct strap tension is arguably more important than the pole length itself. A poorly adjusted strap leads to hand fatigue, blisters, and a loss of control. This guide explains the biomechanics, the step-by-step adjustment process, the finger test, and how to fine-tune for different terrains.
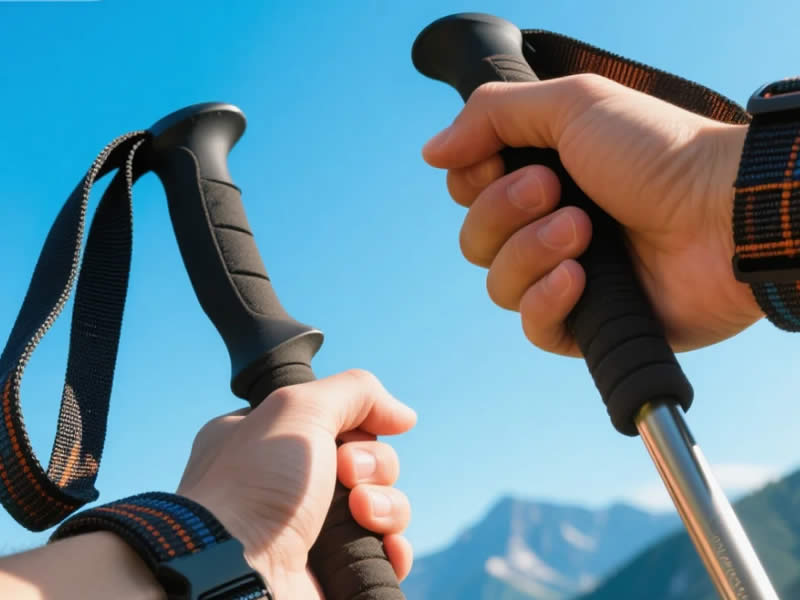
Why the Strap is Crucial
Many walkers treat the strap as a safety leash—a passive device to stop them from dropping the pole. This is a fundamental misunderstanding. The strap is an active part of the pole's mechanism.
- Weight Transfer: The strap is designed to bear the weight of your body. When you plant the pole, the pressure should go straight through the strap into the ground, not through your fingers.
- Efficiency: A correctly adjusted strap allows you to push and pull the pole with your larger arm muscles (your shoulders and back), not just your small forearm muscles.
- Control: The strap gives you a secure connection to the pole, allowing you to guide its angle and placement with greater control.
The Anatomy of a Strap
Most straps have three main components:
- The Main Loop: This is the loop that goes around your hand.
- The Adjuster: A sliding buckle or a clip that allows you to change the length of the loop.
- The Anchor: The point where the strap is fixed to the pole, usually at the top of the grip.
Step-by-Step: The Correct Adjustment
Step 1: The "Up Through" Technique
This is the single most important action to get right.
- Hold the handle as you normally would.
- Take your other hand and locate the strap.
- Thread your hand up through the loop from below. This is non-negotiable. Your hand should enter the loop from the underside of the strap, so the strap runs across the back of your hand and over the top of your palm.
Step 2: Positioning – Where the Strap Should Lie
The strap should sit at a specific point on your hand.
- It should not sit over your wrist like a watch. This restricts your movement.
- It should not sit across the middle of your palm.
- The correct position: The strap should lie diagonally across the fleshy pad at the base of your thumb and index finger. This is the strongest and most padded part of your hand.
Step 3: Gripping the Handle
Once your hand is through the loop, grip the handle. This is the key check: your hand should not be doing the work.
- Grip the handle lightly—just enough to guide it.
- The strap should wrap around the base of your palm, ready to take your weight.
- When you push down, the strap should dig into your palm, not your fingers.
Step 4: Adjusting the Tightness
The adjuster on the strap controls the size of the loop.
- Grip the handle with your hand properly threaded through the strap.
- Adjust the strap so that when you grip, you can just slide a single finger between the strap and the back of your hand.
- The "Finger Test": If you can fit two fingers, it's too loose. If you can't fit a finger, it's too tight.
- The "Dangle Test": Let your arm hang straight down with the pole in your hand. The strap should take the weight of the pole, and your wrist should be in a neutral, straight position.
Terrain-Specific Adjustments
On Ascents
When you're climbing, you are planting the pole uphill. A slightly looser strap allows for the wider arm swing needed for the climb. You can also use the strap to pull yourself up, which is a more efficient technique.
On Descents
On a steep descent, you need more braking force. A slightly tighter strap gives you more control and prevents the pole from rotating in your hand.
On Flat Terrain
On flatter sections, the strap's main job is to maintain rhythm and support your stride. A neutral adjustment, where the strap is comfortable and supportive, is ideal.
Common Mistakes to Avoid
- The Wrong Direction: Putting your hand down through the strap. This is the most common error. It puts the strap across your wrist, restricts your movement, and offers no support.
- Gripping Too Tightly: A death grip tires your forearm muscles and prevents the strap from doing its job.
- Over-Tightening: A strap that is too tight will rub and chafe, causing blisters.
- Under-Tightening: A strap that is too loose offers no support and forces you to compensate by gripping harder.
The Golden Rule
The strap is for support, your hand is for guidance. Your hand should be relaxed, and the strap should bear the weight.
Final Checklist
- □
- □
- □
- □
- □
Over to You
Adjusting your wrist straps correctly is a 10-second fix that can transform your walking experience. It will save your hands from blisters, improve your efficiency, and give you more control on the descents. Take a moment before your next walk to check your straps. Your hands, and your walking rhythm, will thank you. (Word count: ~1,080)
How tight should trekking pole straps be?
Loose enough to slide a finger under, but not so loose that they don't support you. This is the golden rule. When you're gripping the handle, you should be able to fit just one finger between the strap and the back of your hand. This simple test is the key to unlocking the full potential of your trekking poles.
The correct strap tension is arguably more important than the pole length itself. A poorly adjusted strap leads to hand fatigue, blisters, and a loss of control. This guide explains the biomechanics, the step-by-step adjustment process, the finger test, and how to fine-tune for different terrains.
Why the Strap is Crucial
Many walkers treat the strap as a safety leash—a passive device to stop them from dropping the pole. This is a fundamental misunderstanding. The strap is an active part of the pole's mechanism.
- Weight Transfer: The strap is designed to bear the weight of your body. When you plant the pole, the pressure should go straight through the strap into the ground, not through your fingers.
- Efficiency: A correctly adjusted strap allows you to push and pull the pole with your larger arm muscles (your shoulders and back), not just your small forearm muscles.
- Control: The strap gives you a secure connection to the pole, allowing you to guide its angle and placement with greater control.
The Anatomy of a Strap
Most straps have three main components:
- The Main Loop: This is the loop that goes around your hand.
- The Adjuster: A sliding buckle or a clip that allows you to change the length of the loop.
- The Anchor: The point where the strap is fixed to the pole, usually at the top of the grip.
Step-by-Step: The Correct Adjustment
Step 1: The "Up Through" Technique
This is the single most important action to get right.
- Hold the handle as you normally would.
- Take your other hand and locate the strap.
- Thread your hand up through the loop from below. This is non-negotiable. Your hand should enter the loop from the underside of the strap, so the strap runs across the back of your hand and over the top of your palm.
Step 2: Positioning – Where the Strap Should Lie
The strap should sit at a specific point on your hand.
- It should not sit over your wrist like a watch. This restricts your movement.
- It should not sit across the middle of your palm.
- The correct position: The strap should lie diagonally across the fleshy pad at the base of your thumb and index finger. This is the strongest and most padded part of your hand.
Step 3: Gripping the Handle
Once your hand is through the loop, grip the handle. This is the key check: your hand should not be doing the work.
- Grip the handle lightly—just enough to guide it.
- The strap should wrap around the base of your palm, ready to take your weight.
- When you push down, the strap should dig into your palm, not your fingers.
Step 4: Adjusting the Tightness
The adjuster on the strap controls the size of the loop.
- Grip the handle with your hand properly threaded through the strap.
- Adjust the strap so that when you grip, you can just slide a single finger between the strap and the back of your hand.
- The "Finger Test": If you can fit two fingers, it's too loose. If you can't fit a finger, it's too tight.
- The "Dangle Test": Let your arm hang straight down with the pole in your hand. The strap should take the weight of the pole, and your wrist should be in a neutral, straight position.
Terrain-Specific Adjustments
On Ascents
When you're climbing, you are planting the pole uphill. A slightly looser strap allows for the wider arm swing needed for the climb. You can also use the strap to pull yourself up, which is a more efficient technique.
On Descents
On a steep descent, you need more braking force. A slightly tighter strap gives you more control and prevents the pole from rotating in your hand.
On Flat Terrain
On flatter sections, the strap's main job is to maintain rhythm and support your stride. A neutral adjustment, where the strap is comfortable and supportive, is ideal.
Common Mistakes to Avoid
- The Wrong Direction: Putting your hand down through the strap. This is the most common error. It puts the strap across your wrist, restricts your movement, and offers no support.
- Gripping Too Tightly: A death grip tires your forearm muscles and prevents the strap from doing its job.
- Over-Tightening: A strap that is too tight will rub and chafe, causing blisters.
- Under-Tightening: A strap that is too loose offers no support and forces you to compensate by gripping harder.
The Golden Rule
The strap is for support, your hand is for guidance. Your hand should be relaxed, and the strap should bear the weight.
Final Checklist
- □ Hand threaded up through the strap.
- □ Strap lies diagonally across the base of your palm.
- □ Finger fits between the strap and your hand.
- □ Wrist is straight when you let your arm hang.
- □ Grip is light; the strap does the heavy work.
Over to You
Adjusting your wrist straps correctly is a 10-second fix that can transform your walking experience. It will save your hands from blisters, improve your efficiency, and give you more control on the descents. Take a moment before your next walk to check your straps. Your hands, and your walking rhythm, will thank you




