




How do I know if my trekking poles are the correct height?
The short answer is the 90° elbow test. Stand in your hiking boots on level ground, hold a pole vertically with the tip on the ground beside your foot, and bend your elbow to a right angle. Adjust the pole until your forearm is horizontal, your wrist is straight, and the tip just touches the ground. That is your correct flat‑terrain length. But a correct fit isn't just about one test—it's about how the pole feels on the trail. This guide explains the test, the checks, and the adjustments for different terrains.
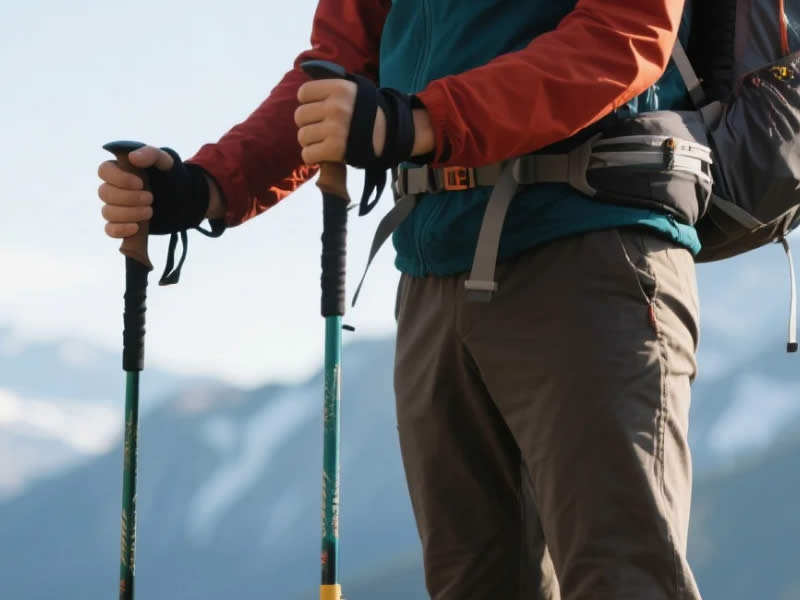
The Golden Rule: The 90° Elbow Test
This is the biomechanical foundation of correct pole length. It's the standard because it accounts for your individual proportions.
How to Do It:
- Put on your hiking boots. The sole adds 1‑2 cm to your effective height. If you test in bare feet or trainers, your poles will be too short.
- Stand on a level surface. Don't do this on a slope.
- Hold the pole vertically with the tip resting on the ground beside your foot.
- Bend your elbow to a 90° angle. Your forearm should be perfectly horizontal, parallel to the ground.
- Adjust the pole length until your hand grips the handle comfortably and your wrist is straight. The tip should just touch the ground without you leaning.
This gives you your flat‑terrain length. This is the length you use on level ground.
The Three Quick Checks
Once you've set the pole, perform these three simple checks.
1. The Wrist Check
Your wrist should be straight. If your wrist is bent upward (extension) or downward (flexion), the pole is the wrong length. A bent wrist leads to fatigue, tendonitis, and a loss of control.
- Wrist bent up (too short): The pole is too short. You are reaching down.
- Wrist bent down (too long): The pole is too long. You are reaching up.
2. The Shoulder Check
Your shoulder should be relaxed and level. You should not have to hunch your shoulder or lift it to reach the ground. If you feel a shrug, the pole is too long and will cause neck and shoulder strain.
3. The "Dangle" Test
Let your arm hang straight down with the pole tip on the ground. Your wrist should be in a neutral, straight position. The strap should take the weight of the pole, and your hand should be relaxed.
Terrain-Specific Adjustments
A single length is not enough for the varied terrain of a UK hillwalk. You need to adjust.
Uphill – Shorten by 5‑7 cm
When you climb, the ground is closer to your hands relative to your body. You need to shorten your poles to keep your shoulders relaxed and your chest open for breathing.
- Why: A shorter pole prevents you from having to raise your shoulder to plant the pole.
- How: Mark your uphill setting with tape or a permanent marker.
Downhill – Lengthen by 5‑10 cm
On a descent, you need a longer pole to reach the ground ahead of you and act as a brake.
- Why: A longer pole gives you the braking leverage you need to protect your knees.
- How: Mark your downhill setting.
Sidehill (Traversing) – Level Your Shoulders
When crossing a slope, your shoulders will naturally be uneven. Adjust the poles to level them.
- Uphill pole: Shorten by 3‑5 cm.
- Downhill pole: Lengthen by 3‑5 cm.
The Strap Connection
The correct pole height is closely linked to the correct strap adjustment. You can have the correct length, but if the strap is wrong, the pole will feel wrong.
- Thread your hand up through the strap. The strap should sit across the base of your palm, not your wrist.
- The strap should take the weight. Your hand is just a guide.
Folding Poles: The Fixed-Length Problem
Folding Z‑poles have a fixed length. You cannot adjust them on the trail. This makes the 90° test even more critical.
- When Buying: You must be sure the length is correct. If you have a folding pole, the 90° test must give a perfect result.
- The "Between Sizes" Problem: If you are between sizes, it's usually better to choose the shorter size for agility on ascents and accept a slightly more bent knee on descents.
The "Feel" Test – Listen to Your Body
The 90° test is a starting point. The ultimate test is how the pole feels on the trail.
- Walk 20 Paces: On flat ground, walk 20 paces with your poles. Do your shoulders feel tense? Do your wrists ache?
- Adjust by 1‑2 cm: If you feel any strain, adjust the length by 1‑2 cm and test again.
- The "Natural Swing" Test: Your poles should feel like a natural extension of your arms. You shouldn't have to think about them.
Special Cases: Tall and Short Walkers
Tall Walkers
Taller people need longer poles. The 90° test is the only reliable method. A formula (height × 0.68) is a starting point, but it's not a replacement for the test.
Children
Children have different proportions. The 90° test is even more critical. You may need a child‑specific pole with a shorter length range and a narrower grip.
A Quick Comparison Table
| Feature | Correct | Incorrect |
|---|---|---|
| Wrist | Straight | Bent up or down |
| Shoulder | Relaxed | Hunched or lifted |
| Forearm | Horizontal (90° elbow) | Angled up or down |
| Strap | Weight on the strap | Weight on the grip |
| Feel | Natural | Strained |
Common Mistakes to Avoid
- Relying Only on the Formula: The 90° test is more accurate than a chart.
- Testing Without Boots: Always test with your boots on.
- Using One Length for All Terrain: You must adjust for uphills and downhills.
- Ignoring the Strap: The strap is part of the length equation.
- Buying Folding Poles Without Testing: A folding pole is a commitment.
The Final Checklist
- □ Wear your hiking boots.
- □ Stand on level ground.
- □ Perform the 90° elbow test.
- □ Check for a straight wrist.
- □ Check for a relaxed shoulder.
- □ Mark your flat‑terrain length.
- □ Mark your uphill and downhill lengths.
- □ Test the length on a short walk.
- □ Adjust by 1‑2 cm if needed.
The Verdict
You know your trekking poles are the correct height when they feel like a natural extension of your arm. The 90° elbow test is the starting point, but the ultimate test is on the trail. If your shoulders are relaxed, your wrists are straight, and you feel a smooth, rhythmic swing, you've found the correct height. Remember to adjust for the terrain—a single length is never enough for a good day's hillwalking. (Word count: ~1,080)
How do I know if my trekking poles are the correct height?
The short answer is the 90° elbow test. Stand in your hiking boots on level ground, hold a pole vertically with the tip on the ground beside your foot, and bend your elbow to a right angle. Adjust the pole until your forearm is horizontal, your wrist is straight, and the tip just touches the ground. That is your correct flat‑terrain length. But a correct fit isn't just about one test—it's about how the pole feels on the trail. This guide explains the test, the checks, and the adjustments for different terrains.
The Golden Rule: The 90° Elbow Test
This is the biomechanical foundation of correct pole length. It's the standard because it accounts for your individual proportions.
How to Do It:
- Put on your hiking boots. The sole adds 1‑2 cm to your effective height. If you test in bare feet or trainers, your poles will be too short.
- Stand on a level surface. Don't do this on a slope.
- Hold the pole vertically with the tip resting on the ground beside your foot.
- Bend your elbow to a 90° angle. Your forearm should be perfectly horizontal, parallel to the ground.
- Adjust the pole length until your hand grips the handle comfortably and your wrist is straight. The tip should just touch the ground without you leaning.
This gives you your flat‑terrain length. This is the length you use on level ground.
The Three Quick Checks
Once you've set the pole, perform these three simple checks.
1. The Wrist Check
Your wrist should be straight. If your wrist is bent upward (extension) or downward (flexion), the pole is the wrong length. A bent wrist leads to fatigue, tendonitis, and a loss of control.
- Wrist bent up (too short): The pole is too short. You are reaching down.
- Wrist bent down (too long): The pole is too long. You are reaching up.
2. The Shoulder Check
Your shoulder should be relaxed and level. You should not have to hunch your shoulder or lift it to reach the ground. If you feel a shrug, the pole is too long and will cause neck and shoulder strain.
3. The "Dangle" Test
Let your arm hang straight down with the pole tip on the ground. Your wrist should be in a neutral, straight position. The strap should take the weight of the pole, and your hand should be relaxed.
Terrain-Specific Adjustments
A single length is not enough for the varied terrain of a UK hillwalk. You need to adjust.
Uphill – Shorten by 5‑7 cm
When you climb, the ground is closer to your hands relative to your body. You need to shorten your poles to keep your shoulders relaxed and your chest open for breathing.
- Why: A shorter pole prevents you from having to raise your shoulder to plant the pole.
- How: Mark your uphill setting with tape or a permanent marker.
Downhill – Lengthen by 5‑10 cm
On a descent, you need a longer pole to reach the ground ahead of you and act as a brake.
- Why: A longer pole gives you the braking leverage you need to protect your knees.
- How: Mark your downhill setting.
Sidehill (Traversing) – Level Your Shoulders
When crossing a slope, your shoulders will naturally be uneven. Adjust the poles to level them.
- Uphill pole: Shorten by 3‑5 cm.
- Downhill pole: Lengthen by 3‑5 cm.
The Strap Connection
The correct pole height is closely linked to the correct strap adjustment. You can have the correct length, but if the strap is wrong, the pole will feel wrong.
- Thread your hand up through the strap. The strap should sit across the base of your palm, not your wrist.
- The strap should take the weight. Your hand is just a guide.
Folding Poles: The Fixed-Length Problem
Folding Z‑poles have a fixed length. You cannot adjust them on the trail. This makes the 90° test even more critical.
- When Buying: You must be sure the length is correct. If you have a folding pole, the 90° test must give a perfect result.
- The "Between Sizes" Problem: If you are between sizes, it's usually better to choose the shorter size for agility on ascents and accept a slightly more bent knee on descents.
The "Feel" Test – Listen to Your Body
The 90° test is a starting point. The ultimate test is how the pole feels on the trail.
- Walk 20 Paces: On flat ground, walk 20 paces with your poles. Do your shoulders feel tense? Do your wrists ache?
- Adjust by 1‑2 cm: If you feel any strain, adjust the length by 1‑2 cm and test again.
- The "Natural Swing" Test: Your poles should feel like a natural extension of your arms. You shouldn't have to think about them.
Special Cases: Tall and Short Walkers
Tall Walkers
Taller people need longer poles. The 90° test is the only reliable method. A formula (height × 0.68) is a starting point, but it's not a replacement for the test.
Children
Children have different proportions. The 90° test is even more critical. You may need a child‑specific pole with a shorter length range and a narrower grip.
A Quick Comparison Table
| Feature | Correct | Incorrect |
|---|---|---|
| Wrist | Straight | Bent up or down |
| Shoulder | Relaxed | Hunched or lifted |
| Forearm | Horizontal (90° elbow) | Angled up or down |
| Strap | Weight on the strap | Weight on the grip |
| Feel | Natural | Strained |
Common Mistakes to Avoid
- Relying Only on the Formula: The 90° test is more accurate than a chart.
- Testing Without Boots: Always test with your boots on.
- Using One Length for All Terrain: You must adjust for uphills and downhills.
- Ignoring the Strap: The strap is part of the length equation.
- Buying Folding Poles Without Testing: A folding pole is a commitment.
The Final Checklist
- □ Wear your hiking boots.
- □ Stand on level ground.
- □ Perform the 90° elbow test.
- □ Check for a straight wrist.
- □ Check for a relaxed shoulder.
- □ Mark your flat‑terrain length.
- □ Mark your uphill and downhill lengths.
- □ Test the length on a short walk.
- □ Adjust by 1‑2 cm if needed.
The Verdict
You know your trekking poles are the correct height when they feel like a natural extension of your arm. The 90° elbow test is the starting point, but the ultimate test is on the trail. If your shoulders are relaxed, your wrists are straight, and you feel a smooth, rhythmic swing, you've found the correct height. Remember to adjust for the terrain—a single length is never enough for a good day's hillwalking.




