


Climbing Descent STOP guide mode setup
The guide mode on a Climbing Descent STOP is a critical feature designed to assist in controlled group descents, rescue operations, or scenarios where a leader needs to manage multiple climbers’ safe lowering. Unlike standard descent mode, guide mode prioritizes stability and precision, allowing one operator to control the rope while monitoring the climber’s progress. Mastering its setup is essential for ensuring safety in team-based climbing activities, from multi-pitch expeditions to caving adventures.
What is Guide Mode, and When to Use It?
Guide mode transforms the STOP descender into a fixed-position control device, typically anchored to a secure point (like a bolt or anchor sling) rather than being held directly by the operator. This setup distributes the climber’s weight across the anchor system, reducing physical strain on the guide and minimizing the risk of accidental slippage. It’s indispensable in situations such as:
Lowering a partner from a pitch while the guide remains at the anchor.
Managing rescues where a climber requires controlled lowering over uneven terrain.
Training new climbers, as it allows the guide to adjust speed incrementally.
Group descents where multiple climbers need to be lowered sequentially from the same anchor.
Most modern STOP models—including Petzl’s STOP Rescue, Black Diamond’s Viper, and DMM’s Pivot—offer guide mode, though activation methods vary by brand. Always confirm your device supports guide mode before attempting setup, as older or basic models may lack this feature.
Step-by-Step Guide to Setting Up Guide Mode
1. Prepare the Anchor System
Start by ensuring the anchor point is rated for the total load (climber + gear + guide’s weight if applicable). Use a locking carabiner to attach a sturdy anchor sling (webbing or dyneema) to the bolt or natural anchor, leaving 6–12 inches of slack for maneuvering the STOP.
2. Position the STOP
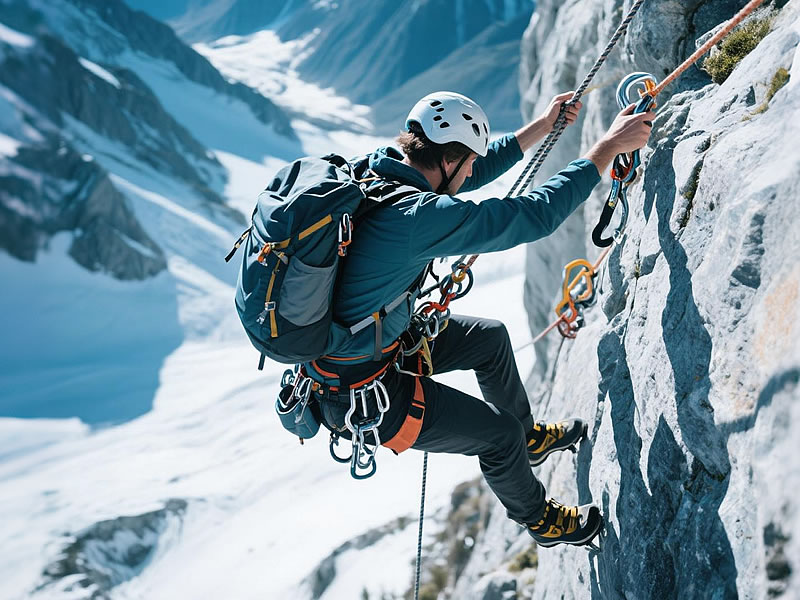
Hold the STOP with the cam lever facing upward and the rope slot visible. For most models, guide mode requires flipping a dedicated switch or rotating a lever—consult your device’s manual to locate this (e.g., Petzl’s STOP uses a red “guide mode” tab on the side). Engage the switch to lock the cam in a fixed position, preventing it from releasing under light tension.
3. Attach the STOP to the Anchor
Clip the STOP’s top attachment point (a reinforced loop or carabiner hole) to the anchor sling using a locking carabiner. Ensure the carabiner is fully closed and tightened—this connection bears the climber’s weight, so redundancy is key. Avoid cross-loading the carabiner, as this weakens its strength.
4. Thread the Rope
Feed the rope through the STOP’s guide mode slot, following the manufacturer’s directional arrows (usually marked “IN” near the anchor and “OUT” toward the climber). For twin ropes, thread both strands simultaneously to maintain balance. Pull 2–3 feet of rope through the device to create slack, which helps in adjusting tension later.
5. Test the Cam Engagement
With the rope threaded, pull gently on the climber-side rope to check if the cam engages. You should feel resistance as the cam grips the rope—this confirms guide mode is active. If the rope slips freely, double-check the guide mode switch position and rethread the rope, ensuring it lies flat against the cam’s friction surface.
6. Connect the Climber
Attach the climber’s harness to the rope using a figure-eight follow-through knot or a locking carabiner (if using a belay loop). Communicate clearly with the climber to confirm they’re ready, then slowly release tension on the rope to initiate the descent. The guide retains control via a secondary rope grip below the STOP, allowing for speed adjustments.
Brand-Specific Nuances in Setup
Petzl STOP Rescue: Features a spring-loaded guide mode lever that must be depressed while flipping to “guide” position. This prevents accidental activation. The rope slot is wider in guide mode to accommodate twin ropes up to 11mm.
Black Diamond Viper: Requires rotating the cam 180 degrees to align with the guide mode markings. Its ergonomic handle stays locked in place, reducing hand fatigue during long descents.
DMM Pivot: Uses a magnetic latch to secure guide mode, ideal for cold or wet conditions where mechanical switches might jam. The pivot point allows 360-degree rope movement, useful on uneven terrain.
Safety Checks Before Descent
Load Test: Apply 10–15kg of weight (e.g., by pulling sharply on the rope) to ensure the anchor and STOP hold firm. Watch for shifting carabiners or stretching slings.
Rope Compatibility: Guide mode often requires thicker ropes (minimum 9mm) to ensure proper cam grip. Using a rope below the recommended diameter increases slippage risk.
Weather Resistance: In rain or snow, wipe the STOP’s cam and rope slot to remove moisture—wet ropes reduce friction, making speed control harder. Consider a dry-treated rope for such conditions.
Backup System: Always attach a prusik knot to the climber’s rope, anchored to your harness, as a secondary safety measure. This catches the climber if the STOP malfunctions.
Troubleshooting Common Issues
Cam Slippage: If the rope slips during descent, check that guide mode is fully engaged and the rope is correctly threaded. Frayed ropes or a dirty cam surface can also cause slippage—clean the cam with a dry brush and inspect the rope for damage.
Stiff Operation: Cold temperatures may stiffen the guide mode switch. Warm the device with your hands or a cloth before activation, avoiding direct heat sources (like lighters) that can damage materials.
Anchor Shift: If the anchor moves during setup, reposition the sling to distribute weight evenly. Add a second anchor point (using a equalized sling) for extra stability on loose rock.
Conclusion
Setting up a Climbing Descent STOP in guide mode demands precision, but the payoff is enhanced safety and control in team climbing scenarios. By following these steps—from anchor preparation to rope threading—and adapting to your device’s brand-specific features, you’ll create a reliable system that protects both climber and guide. Remember: practice guide mode setup in low-risk environments (like a climbing gym) before using it in the field, and always prioritize regular gear inspections. With mastery of this feature, you’ll transform group descents from stressful challenges into streamlined, secure operations.


