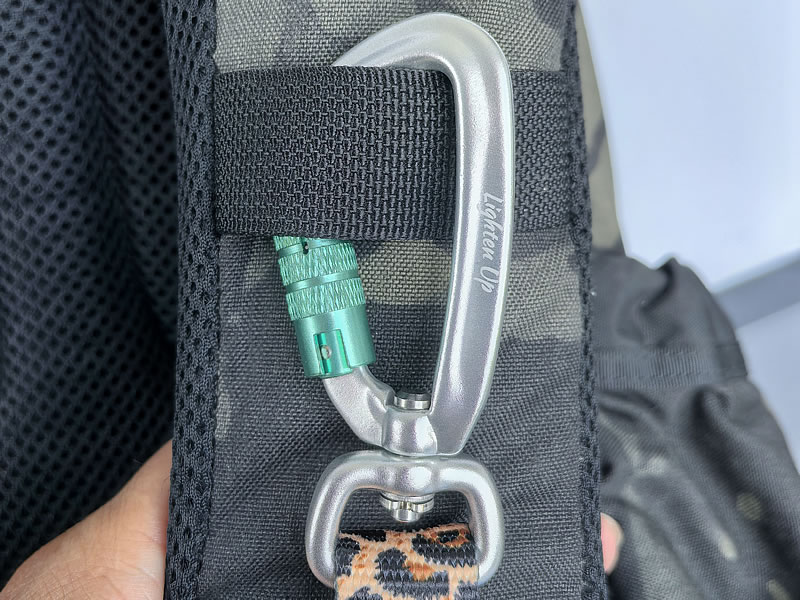
How to Use a Pet Carebiner on a Backpack: The Ultimate Guide for Active Pet Owners
For hikers, runners, and urban adventurers, a backpack is an essential piece of gear. Adding a pet carebiner into the mix can transform your experience, offering unparalleled hands-free convenience while keeping your dog secure and close. But attaching it correctly is paramount for both your comfort and your pet's safety. This guide will walk you through the entire process, from choosing the right anchor point to essential safety checks.

Why Use a Backpack with a Pet Carebiner?
Using a backpack as your anchor point is often superior to a simple belt loop for several reasons. It provides a more stable and centralized connection point, reducing the chance of your dog pulling you off-balance. It also distributes any pulling force across your stronger core and back muscles rather than your hip. This setup is ideal for long hikes, jogging, or navigating crowded spaces where you need your hands free for balance, hydration, or checking your phone.
Step 1: Identify the Perfect Attachment Point
Not all parts of a backpack are created equal. The optimal location is a dedicated load-bearing D-ring. These are commonly found:
- On the hip belt: This is the gold standard. Hip belt D-rings are designed to carry weight and provide a low, central anchor point that keeps your dog's pulls from jerking your upper body.
- On the chest strap: Some hiking packs have a D-ring on the sternum strap, which is also a viable and stable option.
- On the shoulder straps: Use this only if no other option exists, and ensure the strap is very sturdy.
Avoid attaching the carebiner to flimsy fabric loops, zipper pulls, or decorative elements, as these can tear easily under pressure.
Step 2: Execute a Secure Attachment
Once you've found the ideal D-ring, follow these steps for a secure connection:
- Inspect the Gear: Before you clip, do a quick safety check. Ensure the carebiner's gate (the moving part) opens and closes smoothly and that the locking mechanism (screw-lock, auto-locking, or twist-lock) functions correctly.
- Clip to the D-ring: Open the gate and firmly clip the carebiner onto the backpack's D-ring.
- Lock It Down: This is the most critical step. Always fully engage the locking mechanism. If it’s a screw-lock, twist the collar until it won't go any further. For an auto-locking gate, listen for the audible click.
- Attach the Leash: Finally, clip your dog's leash to the free end of the carebiner. Before you start moving, give both connections a gentle tug to confirm everything is secure.
Pro Tips for Safety and Comfort
- The Right Backpack: A hiking pack with a robust hip belt is ideal. A simple daypack without a hip belt will be less stable and transfer all pulling force to your shoulders.
- Maintain Awareness: Hands-free does not mean attention-free. Stay alert to your surroundings and your dog’s movements to prevent the leash from tangling around your legs, brush, or other obstacles on the trail.
- Know Your Dog’s Behavior: This setup is best for dogs with decent leash manners. If your dog is a strong or reactive puller, you may need more direct control by holding the leash, especially in high-traffic areas.
- Practice Makes Perfect: Test this setup in a controlled environment like your backyard before heading out on a major adventure.
By properly using a pet carebiner on your backpack, you unlock a new level of freedom for you and your canine companion. It allows you to enjoy the journey fully, whether you’re conquering a mountain trail or simply running errands around town, with the confidence that your pet is safely secured.


