


Hiking Poles for Balance on Rocky Trails
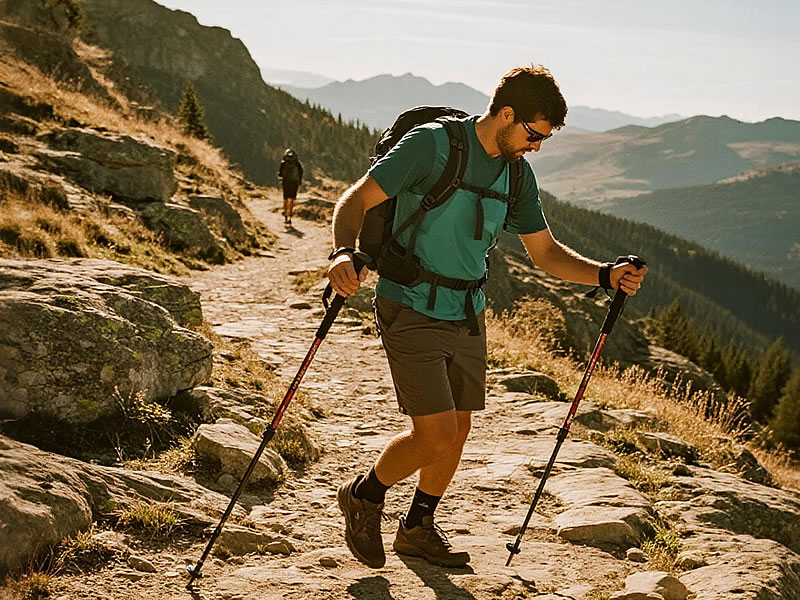
Rocky trails are among the most rewarding yet challenging terrains for hikers—offering stunning vistas but posing constant risks of slips, trips, and knee strain. For anyone navigating loose gravel, jagged boulders, or steep, uneven slopes, hiking poles for balance on rocky trails aren’t just accessories—they’re essential tools that transform stability, reduce fatigue, and protect your body. But not all hiking poles are created equal: to maximize safety and performance on rocky ground, you need to prioritize specific features, understand how to use them effectively, and choose models tailored to the demands of rough terrain.
Recommended trekking pole purchase link: https://s.click.aliexpress.com/e/_c4M7OWaN
Key Features to Prioritize for Rocky Trail Hiking Poles
When shopping for hiking poles for rocky trails, balance and durability should be your top priorities. Here’s what to look for:
1. Shock-Absorbing Mechanisms
Rocky terrain means constant impact—every step onto a hard, uneven surface jolts your knees, hips, and lower back. Hiking poles with internal shock absorbers (usually spring-loaded or hydraulic) cushion this impact, reducing strain by up to 30%, according to outdoor gear testing studies. This is especially critical for longer hikes or hikers with joint issues: without shock absorption, repeated contact with rocks can lead to soreness or injury. Avoid “fixed-stiff” poles for rocky trails—they transfer all impact directly to your body.
2. Durable, High-Traction Tips
The tip of your hiking pole is its first line of defense against slips on rocks. Carbide or tungsten tips are non-negotiable here: these ultra-hard materials bite into rough stone, gravel, and wet rock far better than soft rubber tips (which wear down quickly and slide on smooth surfaces). Many poles come with removable rubber “basket” covers for use on paved trails, but for rocky ground, remove these baskets—they can catch on crevices between rocks and throw off your balance. Look for tips that are at least 8–10mm thick: thinner tips may bend or break under pressure on jagged boulders.
3. Secure, Adjustable Length Locks
Rocky trails rarely have consistent elevation—one minute you’re climbing a steep slope, the next you’re descending a loose gravel patch. Hiking poles for balance on rocky trails must have reliable length-adjustment locks to adapt to these changes. Two types stand out:
- Lever locks: Quick to adjust with one hand (even while wearing gloves) and resistant to dirt buildup (critical for rocky trails, where dust and debris get everywhere).
- Twist locks: Sleeker and lighter, but require more care—dust can jam them, so you’ll need to wipe the poles occasionally.
- Aim for poles with a length range of 24–55 inches (60–140cm): shorter lengths work for steep descents (to keep your center of gravity low), while longer lengths help with ascents (to push off rocks and reduce leg strain). Always double-check that locks are fully tightened before stepping onto unstable rocks—loose poles can collapse mid-step, leading to falls.
- 4. Lightweight yet Sturdy Materials
- Carrying heavy poles on rocky trails adds unnecessary arm fatigue, which can compromise your balance over time. The best materials for rocky trail poles are:
- Carbon fiber: Lightweight (8–12 oz per pole) and strong, with natural vibration-dampening properties. Ideal for hikers who prioritize minimizing weight without sacrificing durability.
- Aluminum alloy (6061 or 7075): More affordable than carbon fiber, slightly heavier (12–16 oz per pole), but extremely tough—resistant to bending or denting if you drop the pole on rocks. Great for beginner hikers or those on a budget.
- Avoid cheap aluminum poles (under 10 oz): they’re often too thin and can snap under pressure on rocky terrain.
- 5. Ergonomic Grips and Wrist Straps
- Your hands and wrists bear significant pressure when using poles on rocks—especially when leaning on them for balance. Foam or cork grips are best: foam wicks sweat (preventing slips) and cushions pressure, while cork conforms to your hand shape and regulates temperature (staying cool in summer and warm in winter). Avoid hard plastic grips—they cause blisters and hand fatigue on long hikes.
- Wrist straps are equally important: look for padded, adjustable straps that distribute weight across your wrist (not just your palm). On rocky trails, straps keep poles from slipping out of your hand if you lose balance—critical when reaching for a rock or steadying yourself on a slope. To use them correctly: thread your hand through the strap from below, then grip the pole—this way, the strap supports the pole’s weight, not your fingers.
- Top Hiking Pole Recommendations for Rocky Trails
- Not sure which poles to choose? Here are three tested models that excel at balance and durability on rocky terrain:
- 1. Black Diamond Trail Ergo Cork Poles
- A favorite among backcountry hikers, these poles check all the boxes for rocky trails. They feature tungsten carbide tips, adjustable lever locks (easy to use with gloves), and ergonomic cork grips that mold to your hand. The internal shock absorber reduces knee impact, and the 6061 aluminum shaft is lightweight (13.6 oz per pole) yet tough enough to withstand drops on rocks. The length adjusts from 26–54 inches, making them suitable for hikers of all heights.
- 2. Leki Micro Vario Carbon Poles
- For hikers who want maximum lightness without compromising strength, the Leki Micro Vario Carbon poles are a top pick. At just 9.5 oz per pole, they’re easy to carry on long rocky hikes, and the carbon fiber shaft dampens vibration from rock impacts. The tungsten tips grip wet or smooth rocks, and the twist locks (with a dust-resistant design) stay secure even in gravel. The foam grips wick sweat, and the padded wrist straps reduce wrist strain—perfect for steep rocky ascents.
- 3. REI Co-op Traverse Trekking Poles
- A budget-friendly option that doesn’t skimp on quality, the REI Co-op Traverse poles are ideal for beginner hikers. Made from 7075 aluminum (stronger than standard 6061 aluminum), they can handle rough rocks without bending. The carbide tips provide excellent traction, and the lever locks are easy to adjust. The foam grips are comfortable for hours of use, and the poles weigh 15 oz each—light enough for all-day hikes. They adjust from 24–55 inches, fitting most hikers.
- Pro Tips for Using Hiking Poles on Rocky Trails
- Even the best poles won’t help if you don’t use them correctly. Here’s how to maximize balance and safety:
- Plant poles first, then feet: When stepping onto a rocky patch, plant your poles firmly on stable ground before putting weight on your foot. This creates a “tripod” of support (two poles + one foot) to prevent slips.
- Adjust length for elevation: Shorten poles by 5–10cm when descending steep rocks (this keeps your body upright and reduces knee strain). Lengthen them by the same amount when ascending (to push off rocks and lighten leg load).
- Avoid over-leaning: Use poles for balance, not as a crutch. Leaning too heavily on poles can make you unstable if a tip slips—keep your weight centered over your feet, with poles providing extra support.
- Clean tips regularly: After hiking on gravel or dusty rocks, wipe the tips and locks with a cloth. Dust can jam locks or reduce traction, so a quick clean keeps poles working reliably.
- Why Hiking Poles Are Non-Negotiable for Rocky Trails
- Rocky terrain demands more from your body than flat trails—every step requires careful balance, and the risk of injury is higher. Hiking poles for balance on rocky trails address these challenges by:
- Reducing knee and hip impact by up to 30%.
- Providing two extra points of contact with the ground (critical for unstable rocks).
- Lightening your leg load, so you stay fresher longer.
- Preventing slips with high-traction tips.
- Whether you’re a beginner tackling your first rocky trail or an experienced hiker exploring backcountry terrain, investing in the right hiking poles will make your trip safer, more comfortable, and more enjoyable. By prioritizing shock absorption, durable tips, and adjustable locks, you’ll have a tool that keeps you balanced—no matter how rough the rocks get.


