


How to cross rivers with trekking poles?
River crossings are one of the most unpredictable and potentially hazardous obstacles hikers face. A slippery rock or strong current can quickly lead to a dangerous fall. Trekking poles are your most valuable tool for navigating these challenges safely, transforming uncertainty into controlled stability. Here’s a comprehensive guide to using them effectively.
Recommended trekking pole purchase link: https://s.click.aliexpress.com/e/_c4M7OWaN
1. The Golden Rule: Scout and Unbuckle
Never rush into a crossing. Your first step is always to stop and assess.
- Scout the Route: Look for the widest, and often slowest-moving, section of the river. This is usually where the water is shallowest. Avoid areas above waterfalls or logjams. Look for sand or gravel bars and solid-looking rocks for footing.
- Unbuckle Your Pack: Before entering the water, unbuckle your hip belt and chest strap. This is a critical safety precaution. If you fall, you need to be able to shed your heavy pack immediately to avoid being pinned underwater.
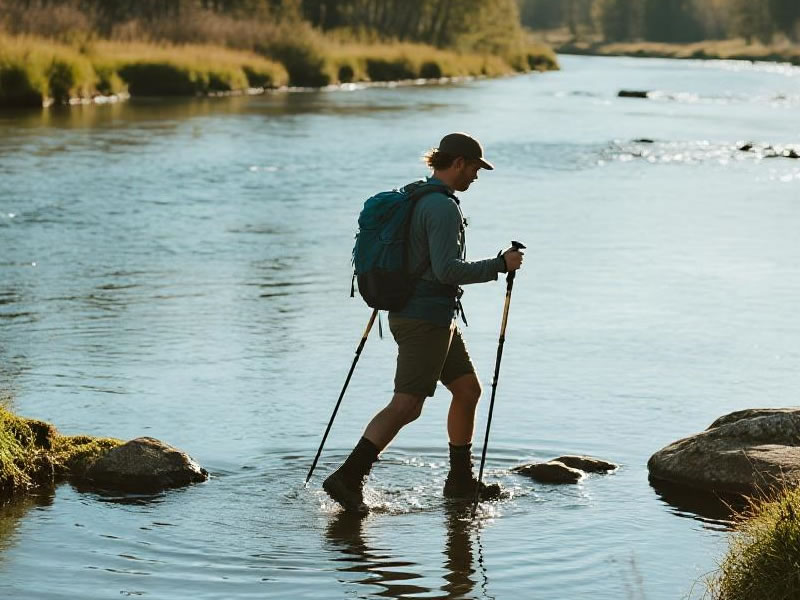
2. Pole Setup and Entry Technique
Configure your gear for maximum stability before you get wet.
- Lengthen Your Poles: Extend them 10-15 cm (4-6 inches) longer than your normal flat-ground setting. This allows you to plant them securely upstream while maintaining an upright posture in deeper water.
- Face Upstream and Angle Poles: Always face upstream, leaning slightly into the current for balance. Plant your poles upstream of your body, using the force of the current to help anchor them against the riverbed.
- The Three-Point Stance: This is the core technique for safety. At all times, have two points of contact with the riverbed. Move one pole and plant it securely. Then move one foot. Next, move the other pole, followed by the other foot. You are always supported by a stable tripod (two poles and one foot) or a solid base (one pole and two feet).
3. The Crossing Method: The Sideways Shuffle
Do not walk straight across. The most stable method is to shuffle sideways.
- Crab Walk: Move sideways like a crab, keeping your feet wide for a low center of gravity. Take small, deliberate steps, feeling for solid footing before shifting your weight.
- Test with Poles: Use your upstream poles to probe the depth and test the stability of rocks ahead of you. A solid "thunk" on rock is good; a "clunk" or a sink into mud means find another spot.
- Team Crossing: In a group, the strongest person should be upstream. Cross in a line, linked arm-in-arm, or in a tight circle facing each other with hands on each other's packs. The upstream person breaks the current for those downstream.
4. Key Considerations and Mistakes to Avoid
- Footwear: Do not cross barefoot. Wear your hiking shoes or approach shoes to protect your feet and provide grip on slippery surfaces.
- Avoid Looking Down: Focus on your destination point on the opposite bank, not at the rushing water at your feet, to maintain balance.
- Never Cross Above Waist-Deep Water: If the water is deeper than your waist, the force of the current is too powerful. Turn back and find a safer crossing point, a bridge, or wait for water levels to drop.
- Respect the Water: If you have any doubt about the safety of a crossing, do not attempt it. Your safety is more important than sticking to your planned route.
By using your trekking poles to create a stable three-point stance, facing upstream, and moving with a deliberate sideways shuffle, you harness the water’s force to your advantage. This methodical approach turns a nerve-wracking obstacle into a manageable—and even confident—part of your backcountry journey.


